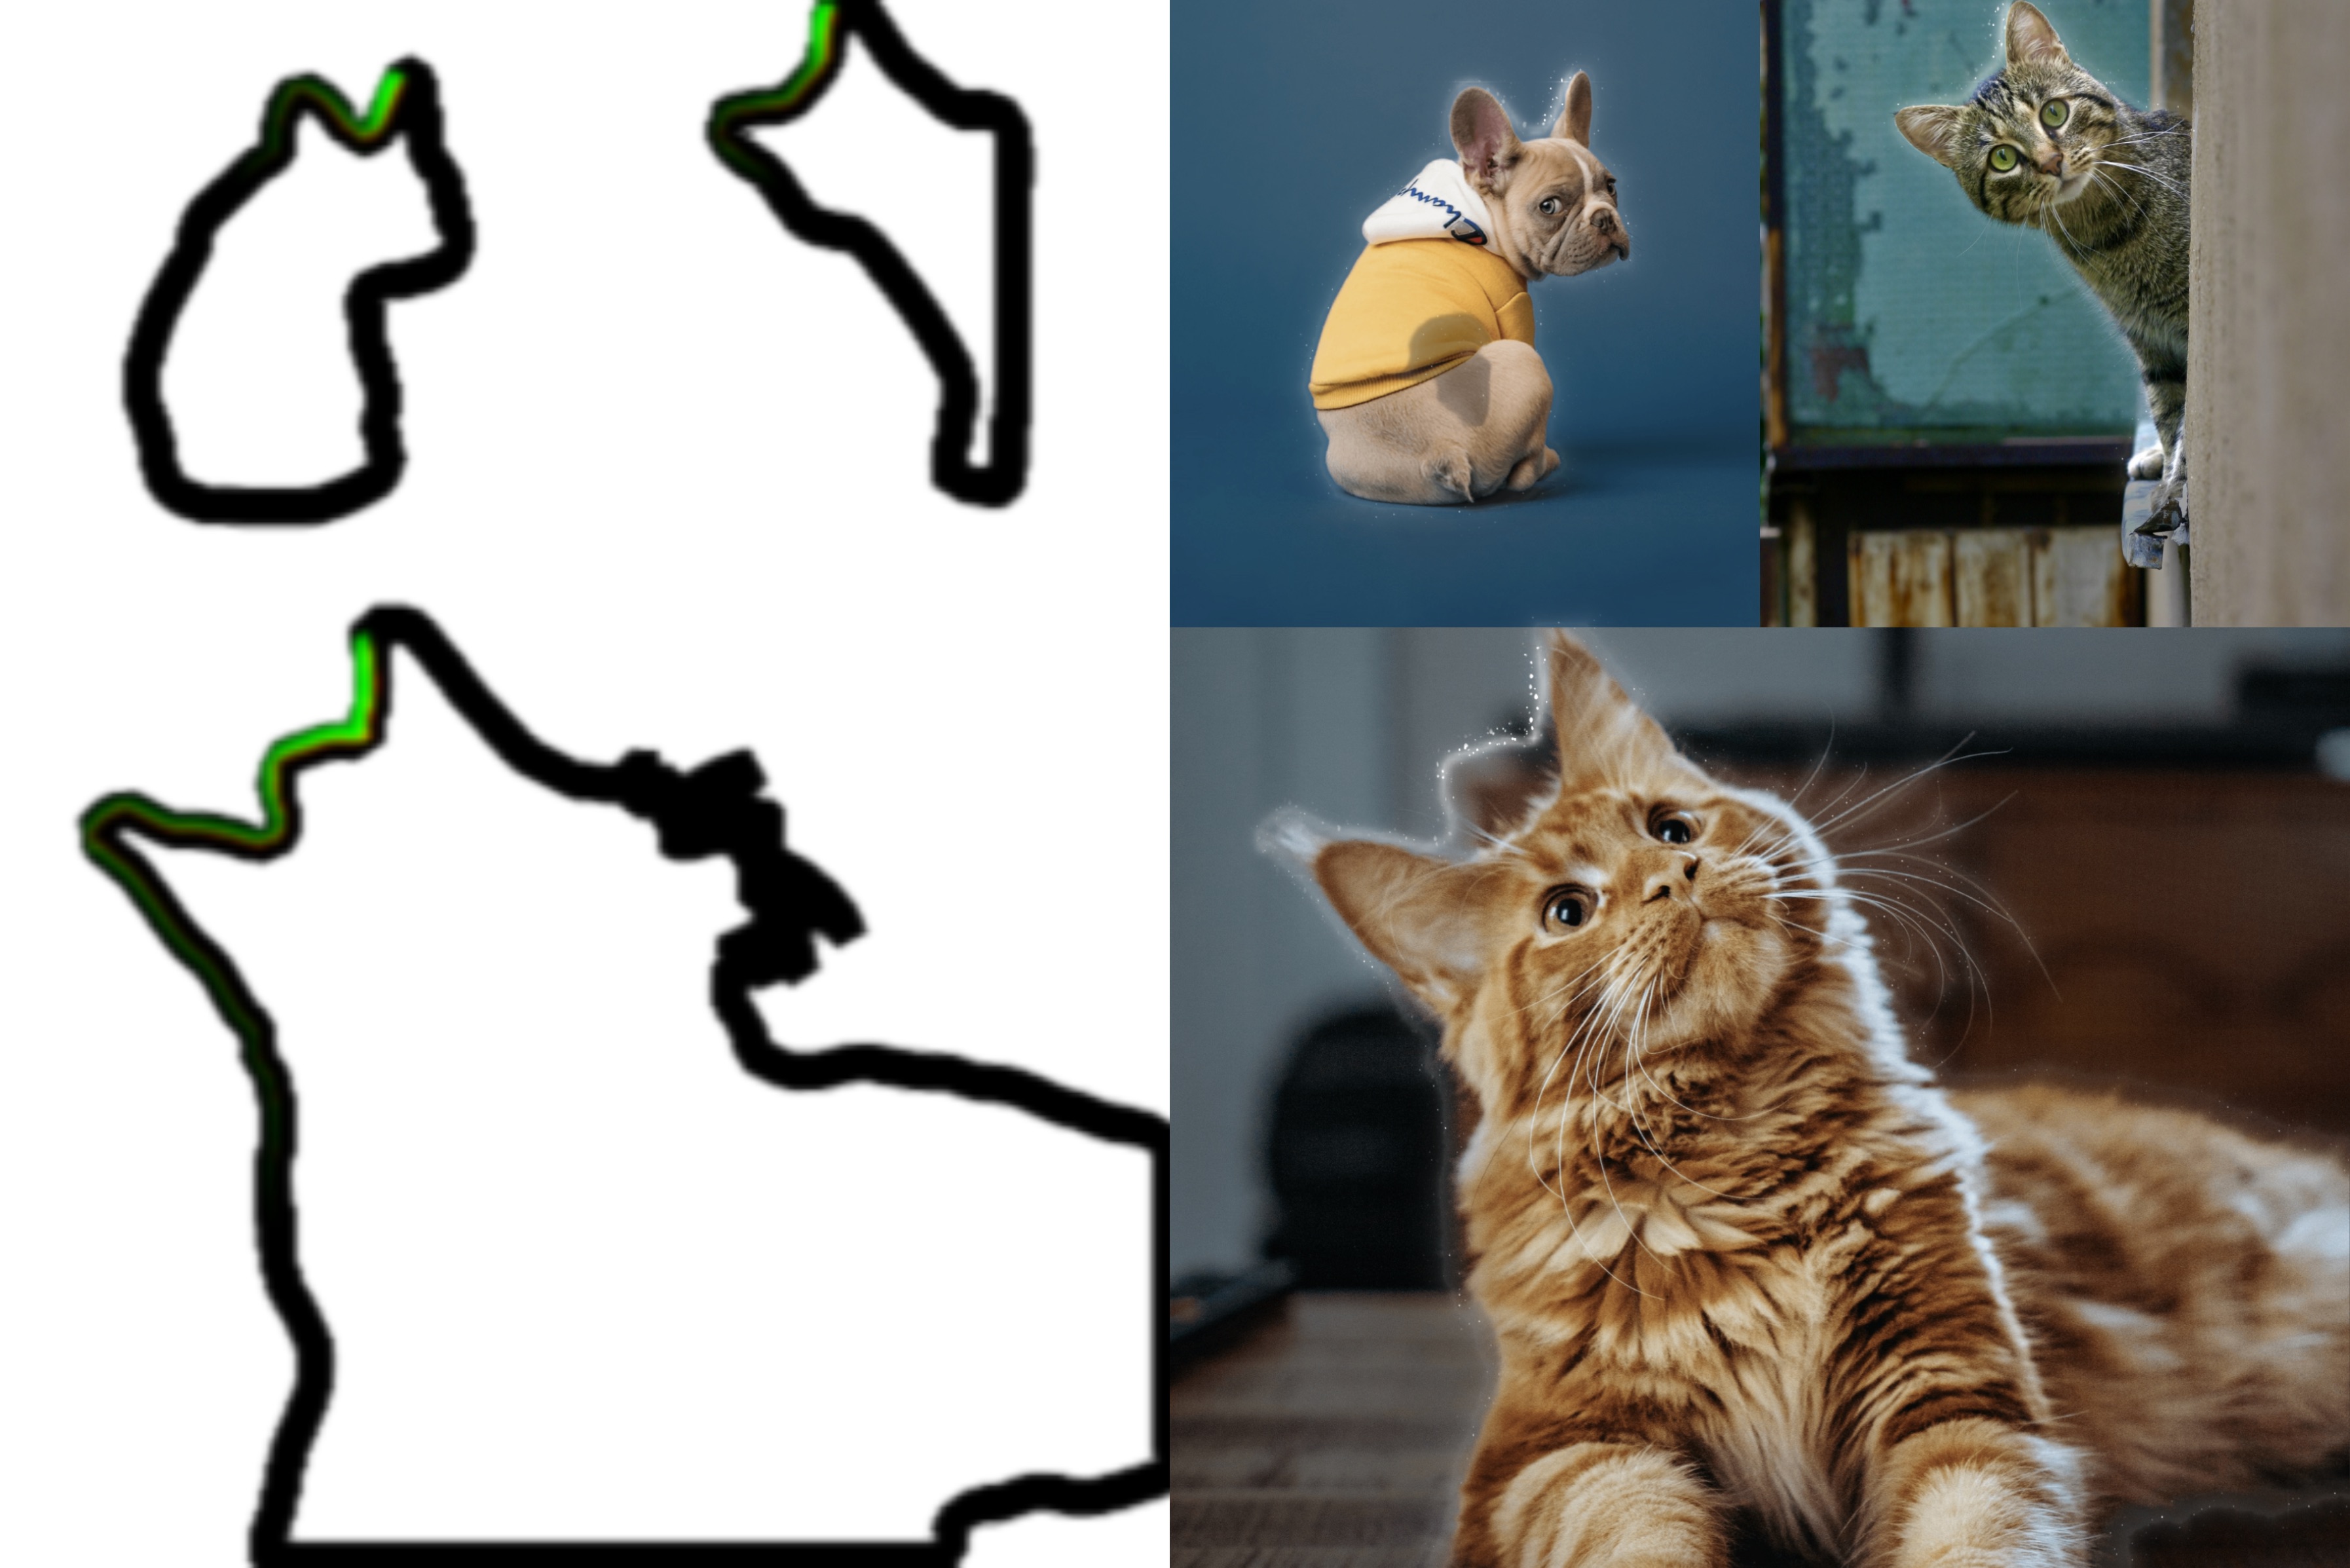
1. Path Triangulation
The cutout algorithm returns a path in JSON format; we need to convert these line segments into mesh lines for rendering. Many people have already shared methods for converting paths to mesh lines. In this project, we are using the most basic method. If you are interested, you can check out the following articles.
for (let j=0; j< segments.length; j++) {
  const cs = segments[j]

  // direction
  const v = cs.mp2.clone().sub(cs.mp1)

  const t0: Vector2 = t2 ?? cs.e1p1
  let t1: Vector2 = t3 ?? cs.e2p1

  t2 = j === segments.length - 1 ? segments[0].e1p1 : cs.e1p2
  t3 = j === segments.length - 1 ? segments[0].e2p1 : cs.e2p2

  // cross check
  // if (intercept(t1, t0, t3, t2, false)) {
  //   t2 = t0
  //   t3 = t1
  //   continue
  // }

  // offset vertex by some amount along segment's normal.
  vertices.push( t1.x / scale.x - 0.5, 0.5 - t1.y / scale.y, 0.0 )
  vertices.push( t0.x / scale.x - 0.5, 0.5 - t0.y / scale.y, 0.0 )
  vertices.push( t2.x / scale.x - 0.5, 0.5 - t2.y / scale.y, 0.0 )

  vertices.push( t3.x / scale.x - 0.5, 0.5 - t3.y / scale.y, 0.0 )
  vertices.push( t1.x / scale.x - 0.5, 0.5 - t1.y / scale.y, 0.0 )
  vertices.push( t2.x / scale.x - 0.5, 0.5 - t2.y / scale.y, 0.0 )

  ...
}

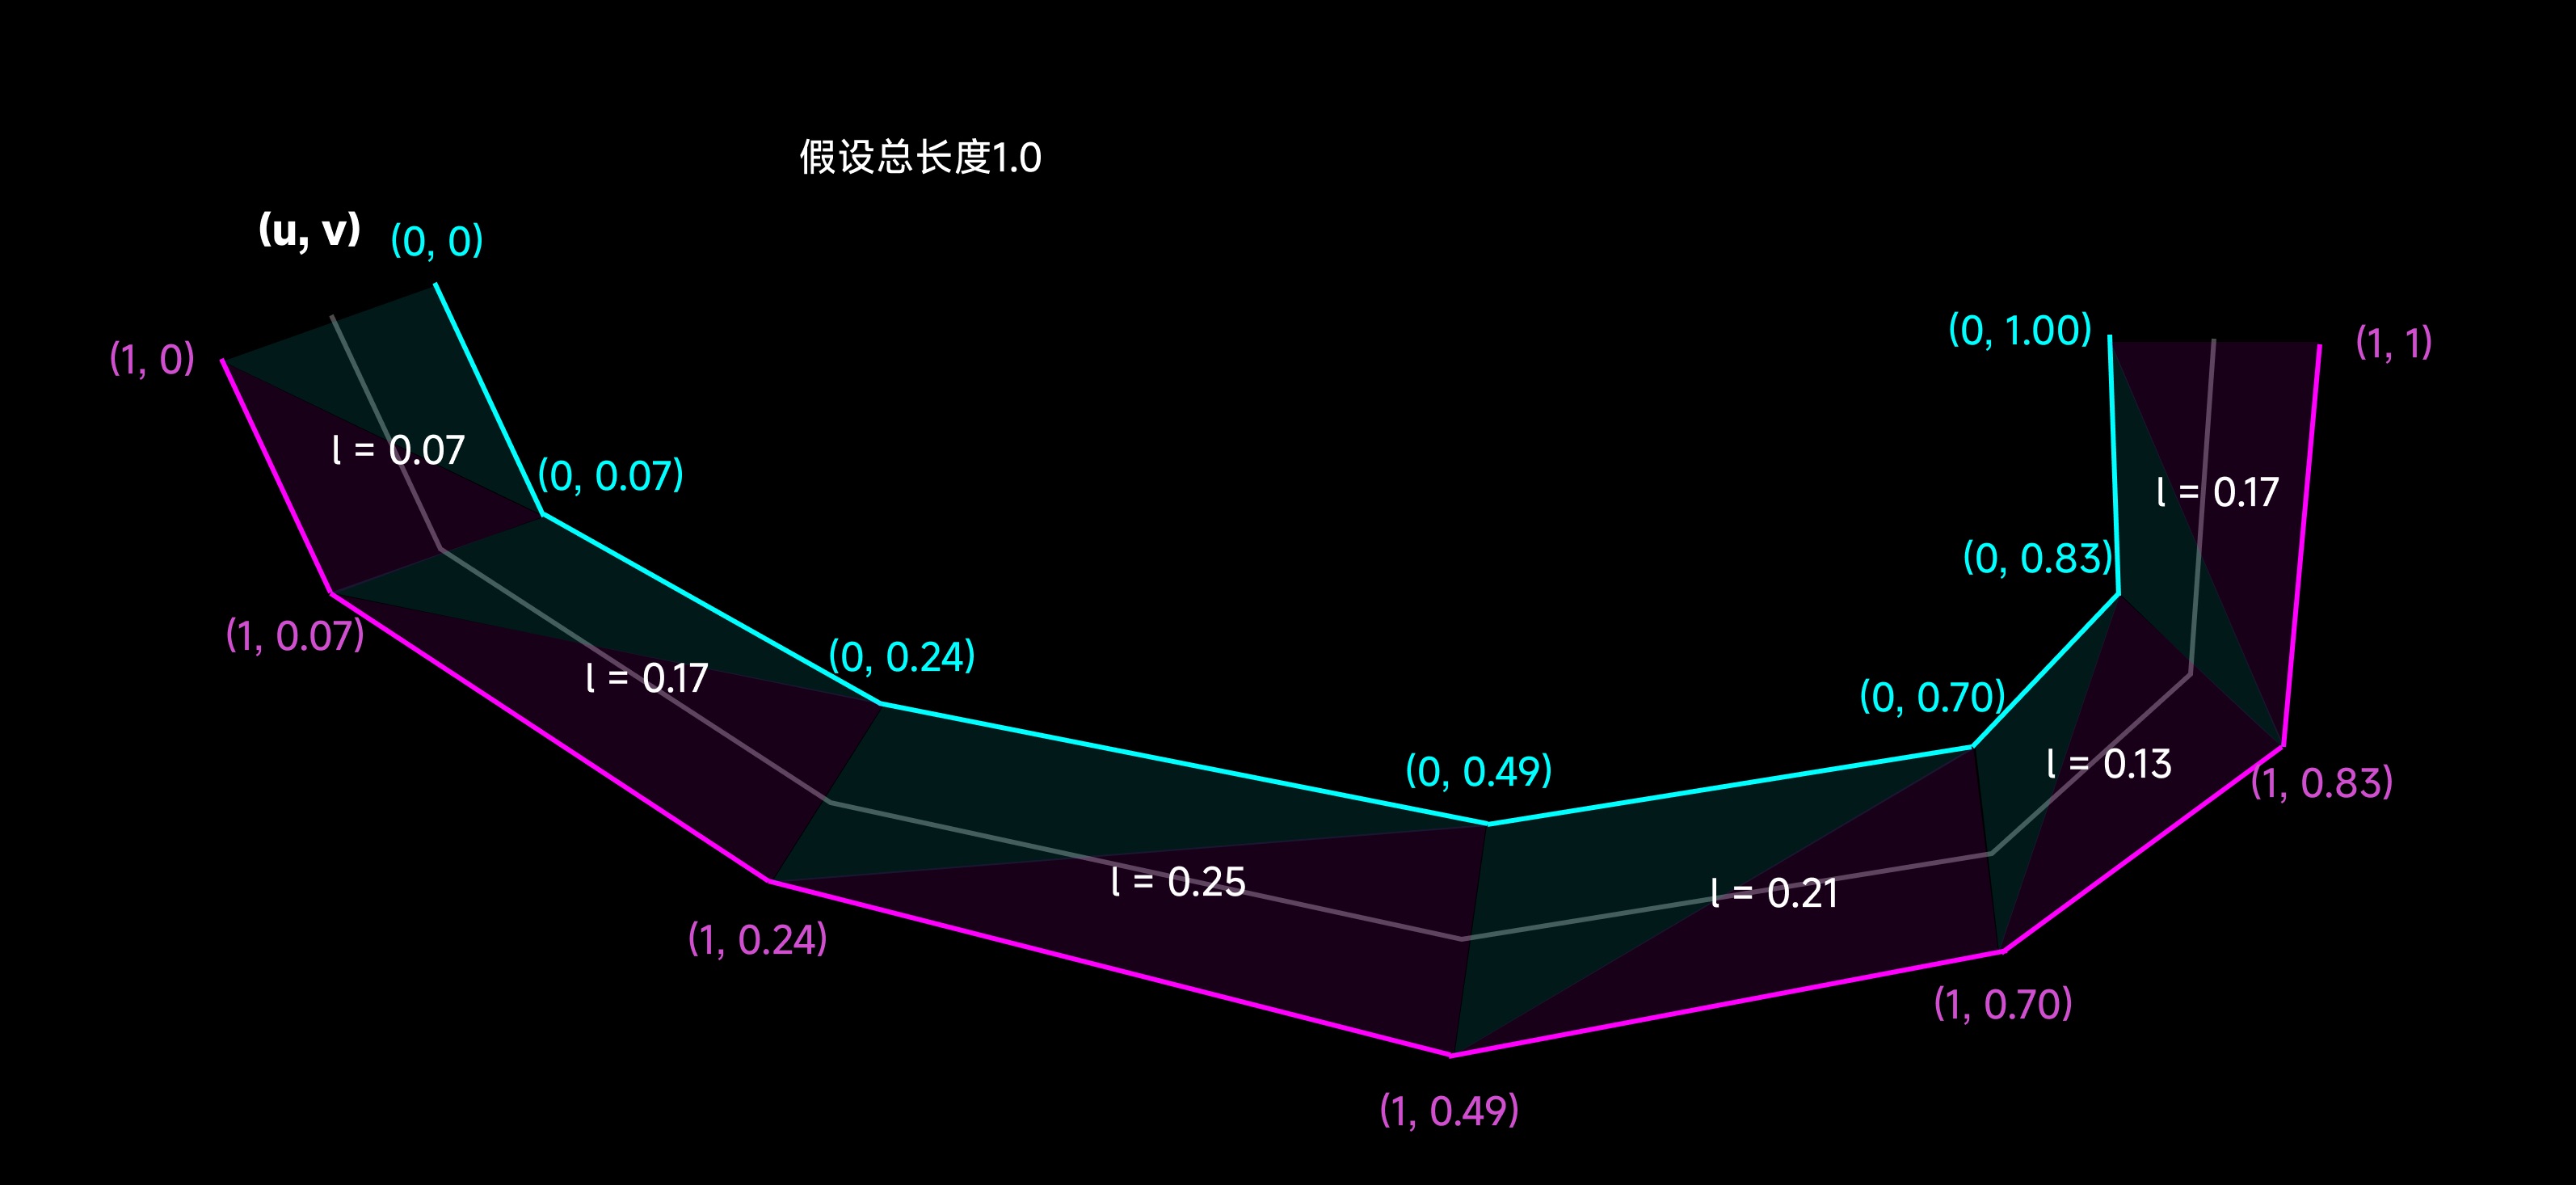
2. UV Remapping
Recalculate vertex UVs along the path so that textures can be mapped uniformly.
for (let j=0; j< segments.length; j++) {

  ...

  // remap UV
  mappedVertices.push( 0.0, l )
  mappedVertices.push( 1.0, l )
  mappedVertices.push( 1.0, l + v.clone().length() )

  mappedVertices.push( 0.0, l + v.clone().length() )
  mappedVertices.push( 0.0, l )
  mappedVertices.push( 1.0, l + v.clone().length() )

  l += v.clone().length()
}

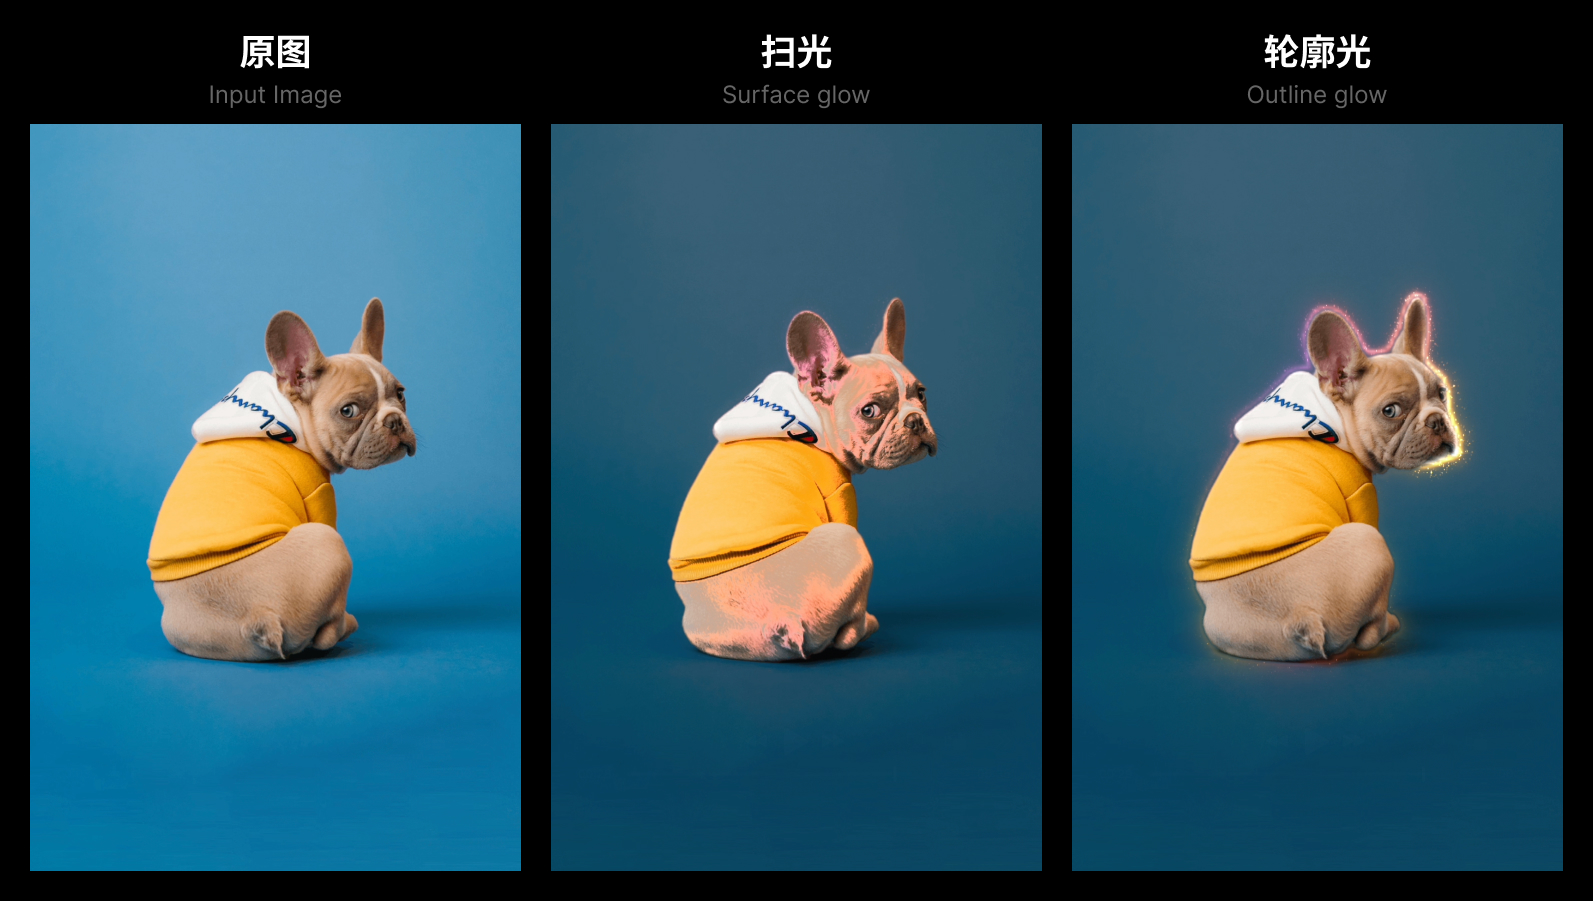
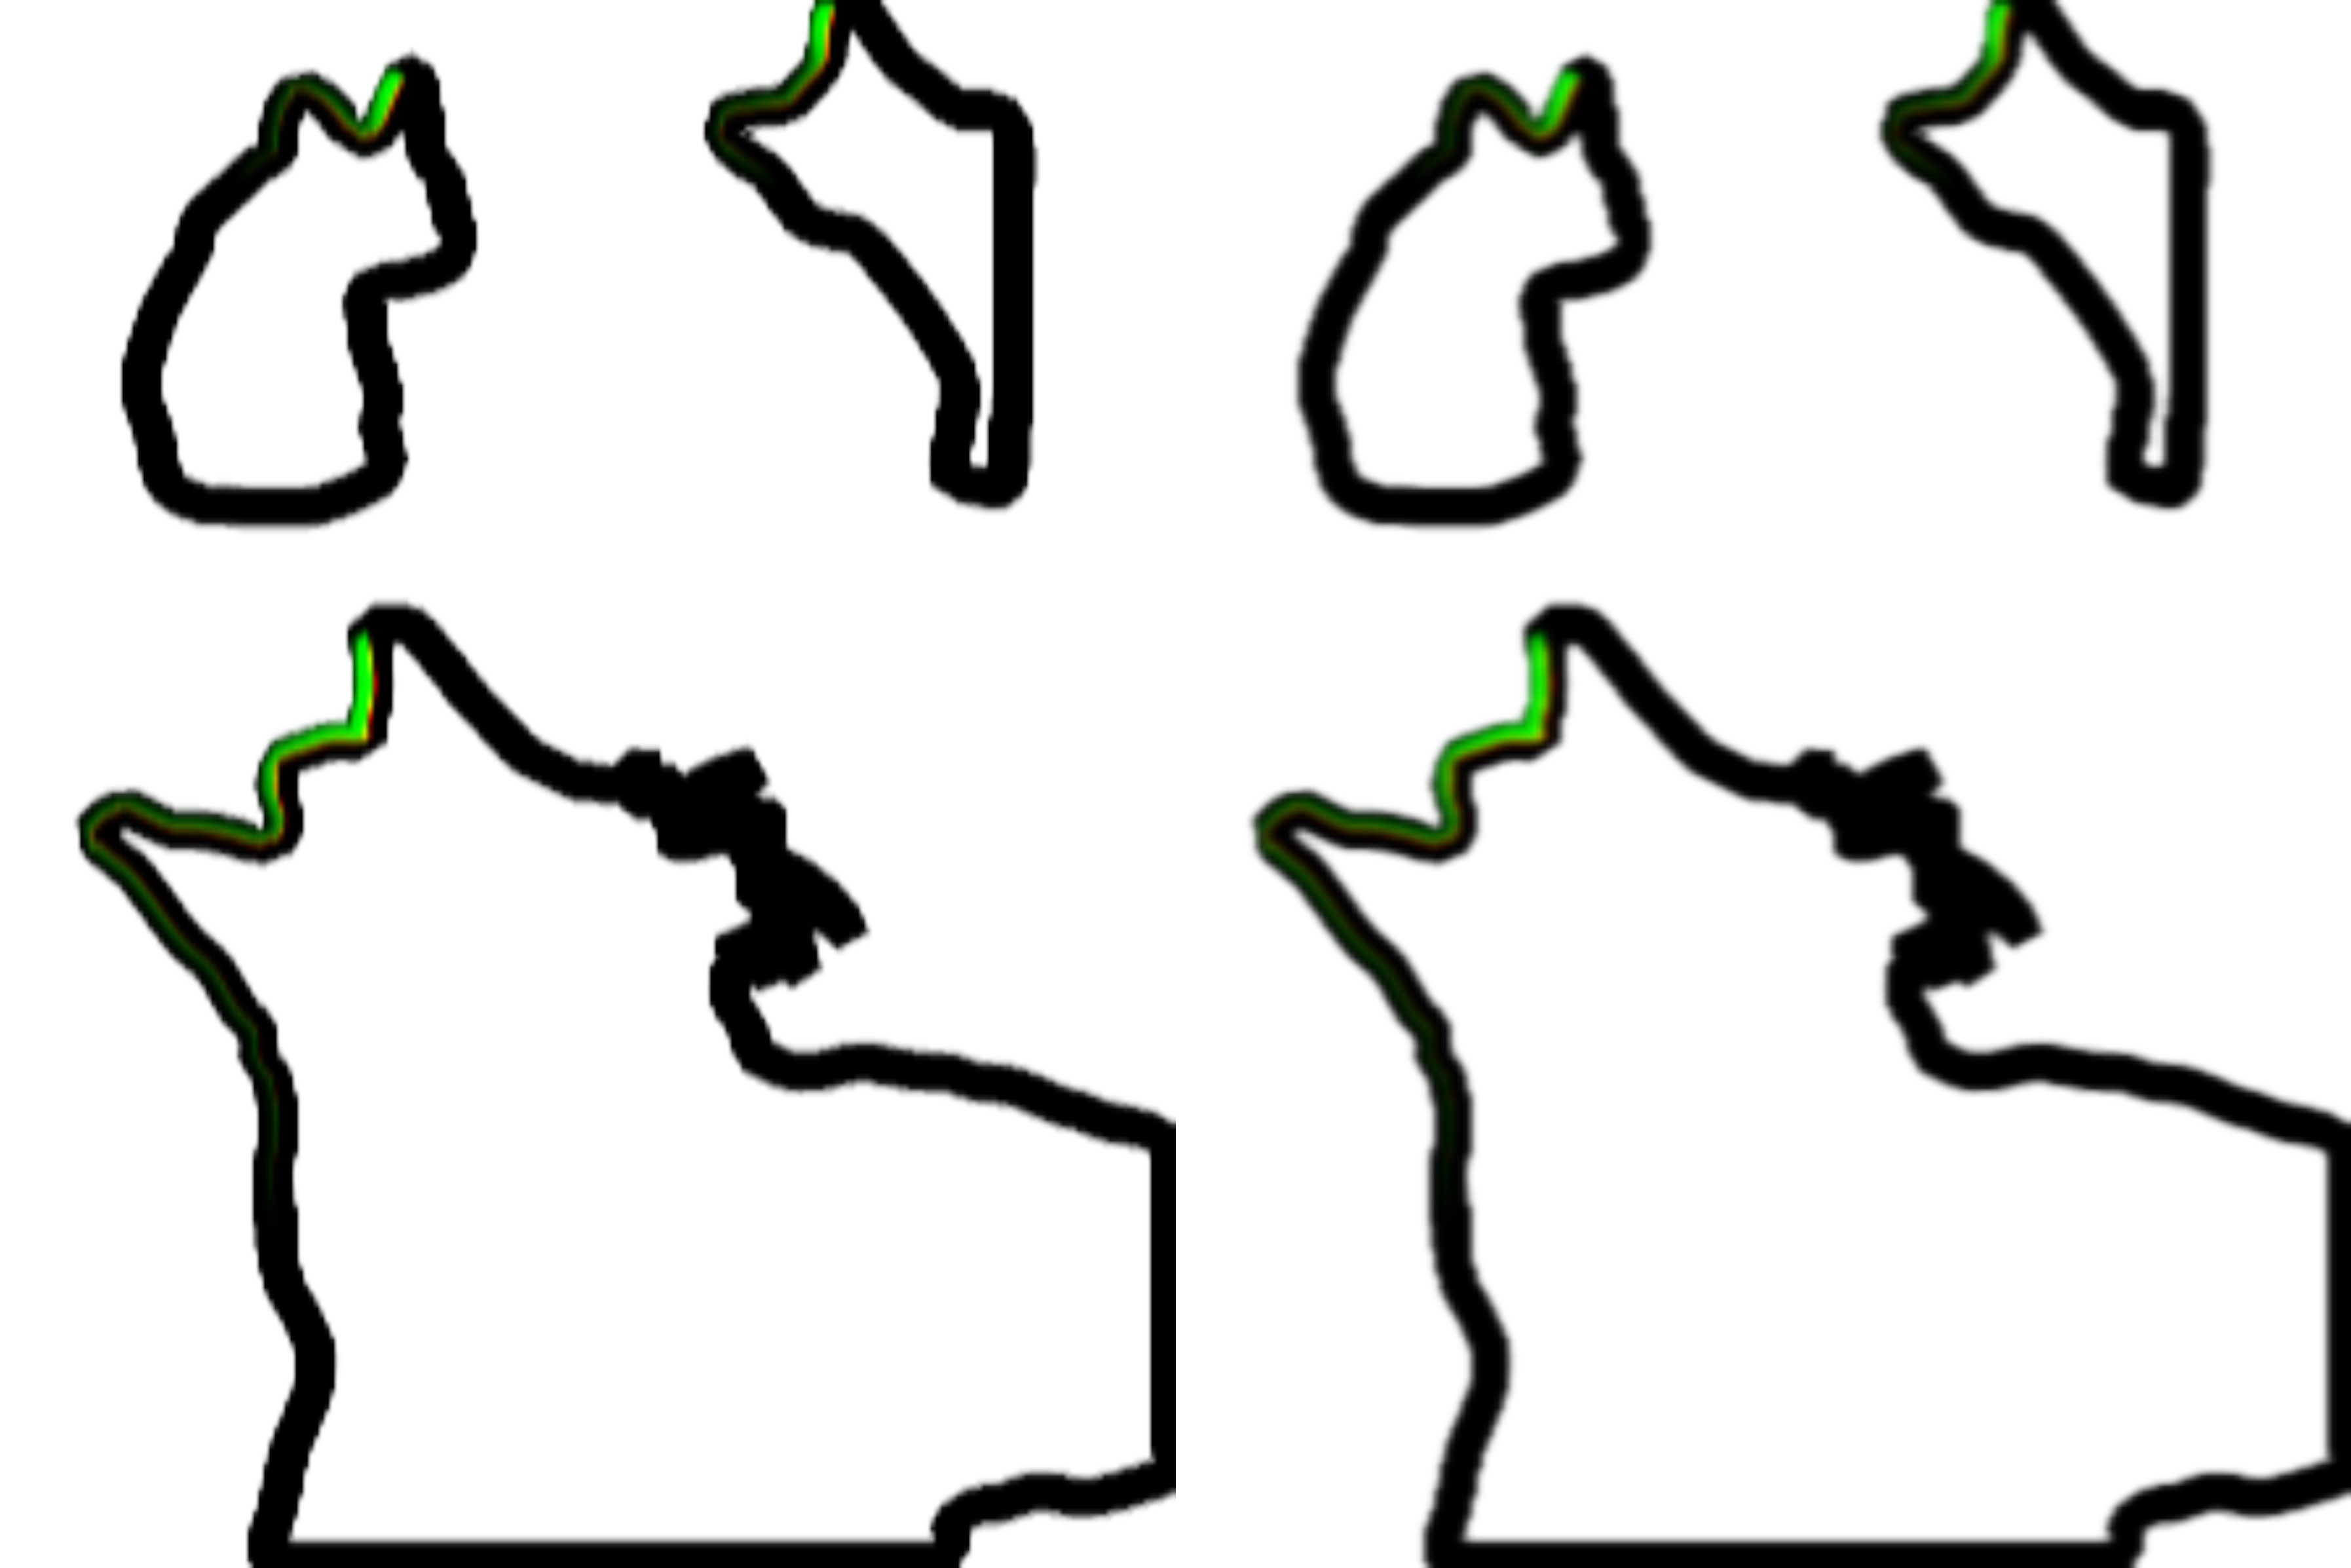
3. Animate texture coordinates
When rendering outlines and glow effects, we need to map the outline and glow materials (regions) along the unfolded UV in the first render pass, and then render the corresponding positions in the R and G channels (red and green parts) according to the lighting progress. This way, during the final composition, these two channels can be used to control the animation progress of the outlines and glow effects.
varying vec2 aUv;
varying vec2 vUv;

uniform float uProgress;
uniform float uLineAlpha;
uniform float uRegionAlpha;
uniform float uHighlightWidth;
uniform float uLineLength;

uniform sampler2D uWandTex;
uniform sampler2D uGlowTex;

float map(float x1, float x2, float y1, float y2, float x) {
  return (x - x1) / (x2 - x1) * (y2 - y1) + y1;
}

float shiftMod(float x, float offset, float m) {
  return x + offset > m ? x + offset - m : x + offset;
}

void main() {
  float progress = uProgress;
  float end = progress - uLineLength;
  float start = progress;
  float x = aUv.x;
  float y = 1.0-aUv.y;

  if (end < 0.0) {
    y = shiftMod(y, -end, 1.0);
    start = shiftMod(start, -end, 1.0);
    end = shiftMod(end, -end, 1.0);
  }

  vec2 st = vec2(x, y);
  st.y = map(start, end, 1.0, 0.0, st.y);

  float region = texture(uGlowTex, st).a * uRegionAlpha;
  if (st.y > 0.99 || st.y < 0.01 || st.x > 0.99 || st.x < 0.01) region = 0.0;

  st.x -= 0.5;
  st.x *= uHighlightWidth;
  st.x += 0.5;

  float border = texture(uWandTex, st).a * uLineAlpha;

  // clamp edge with transparent white pixels
  if (st.y > 0.99 || st.y < 0.01 || st.x > 0.99 || st.x < 0.01) border = 0.0;

  gl_FragColor = vec4(border, region, 0.0, 1.0);
}
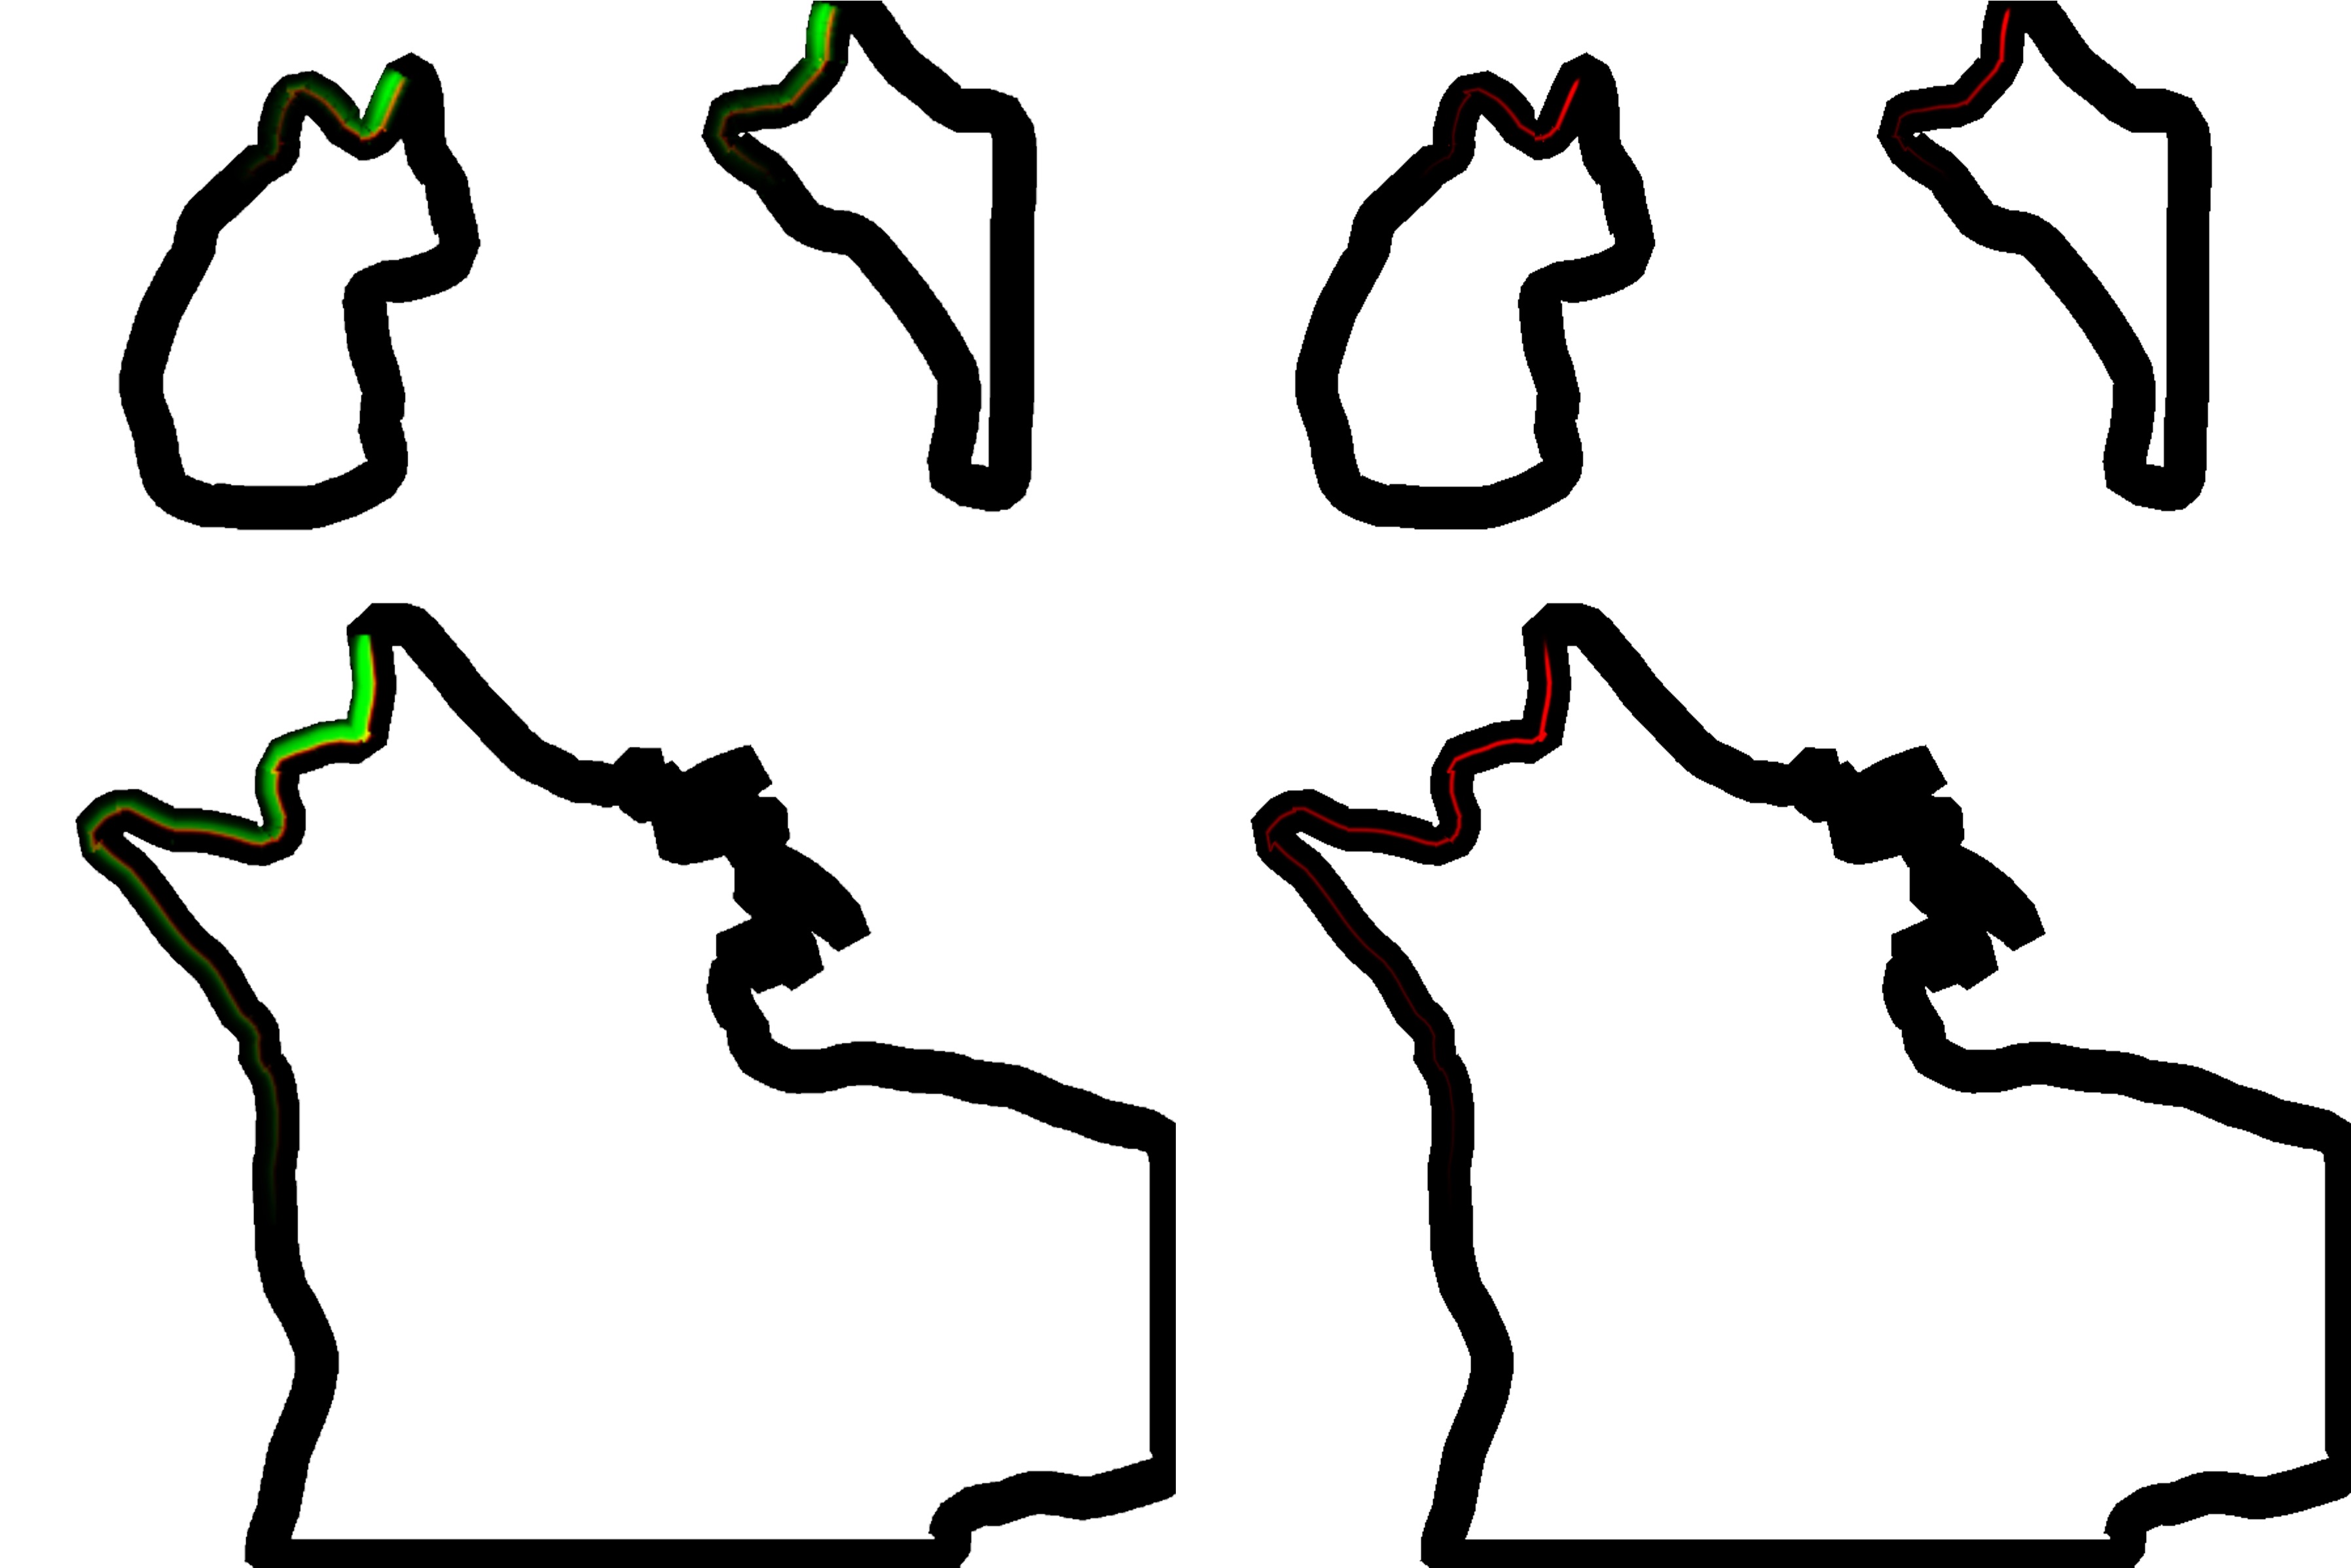
4. Fast guassian blur
Until now, there are still two issues that need to be resolved:
- How to make the rendered result have a sense of light?
- How to solve the UV overlap issue at the corners?
In this project, we use a two-pass Gaussian blur to address these two issues. The two-pass Gaussian blur decomposes the traditional 2D convolution kernel into two 1D convolution kernels. This way, we can use some special tricks to reduce the amount of computation while preserving the original image information as much as possible.
// h-blur
const float offset[3] = float[](0.0, 1.3846153846, 3.2307692308);
const float weight[3] = float[](0.2270270270, 0.3162162162, 0.0702702703);
const float LOD = 2.0;
const float RES = 512.0;

uniform sampler2D uTex;
varying vec2 vUv;
uniform float uAspectRatio;

void main() {
  vec4 color = textureLod(uTex, vUv, LOD) * weight[0];
  for (int i=1; i<3; i++) {
    color += textureLod(uTex, vUv + vec2(0.0, offset[i] * uAspectRatio / RES), LOD) * weight[i];
    color += textureLod(uTex, vUv - vec2(0.0, offset[i] * uAspectRatio / RES), LOD) * weight[i];
  }

  gl_FragColor = color;
}
// v-blur
const float offset[3] = float[](0.0, 1.3846153846, 3.2307692308);
const float weight[3] = float[](0.2270270270, 0.3162162162, 0.0702702703);
const float LOD = 2.0;
const float RES = 512.0;

uniform sampler2D uTex;

varying vec2 vUv;

void main() {
  vec4 color = textureLod(uTex, vUv, LOD) * weight[0];
  for (int i=1; i<3; i++) {
    color += textureLod(uTex, vUv + vec2(offset[i] / RES, 0.0), LOD) * weight[i];
    color += textureLod(uTex, vUv - vec2(offset[i] / RES, 0.0), LOD) * weight[i];
  }

  gl_FragColor = color;
}
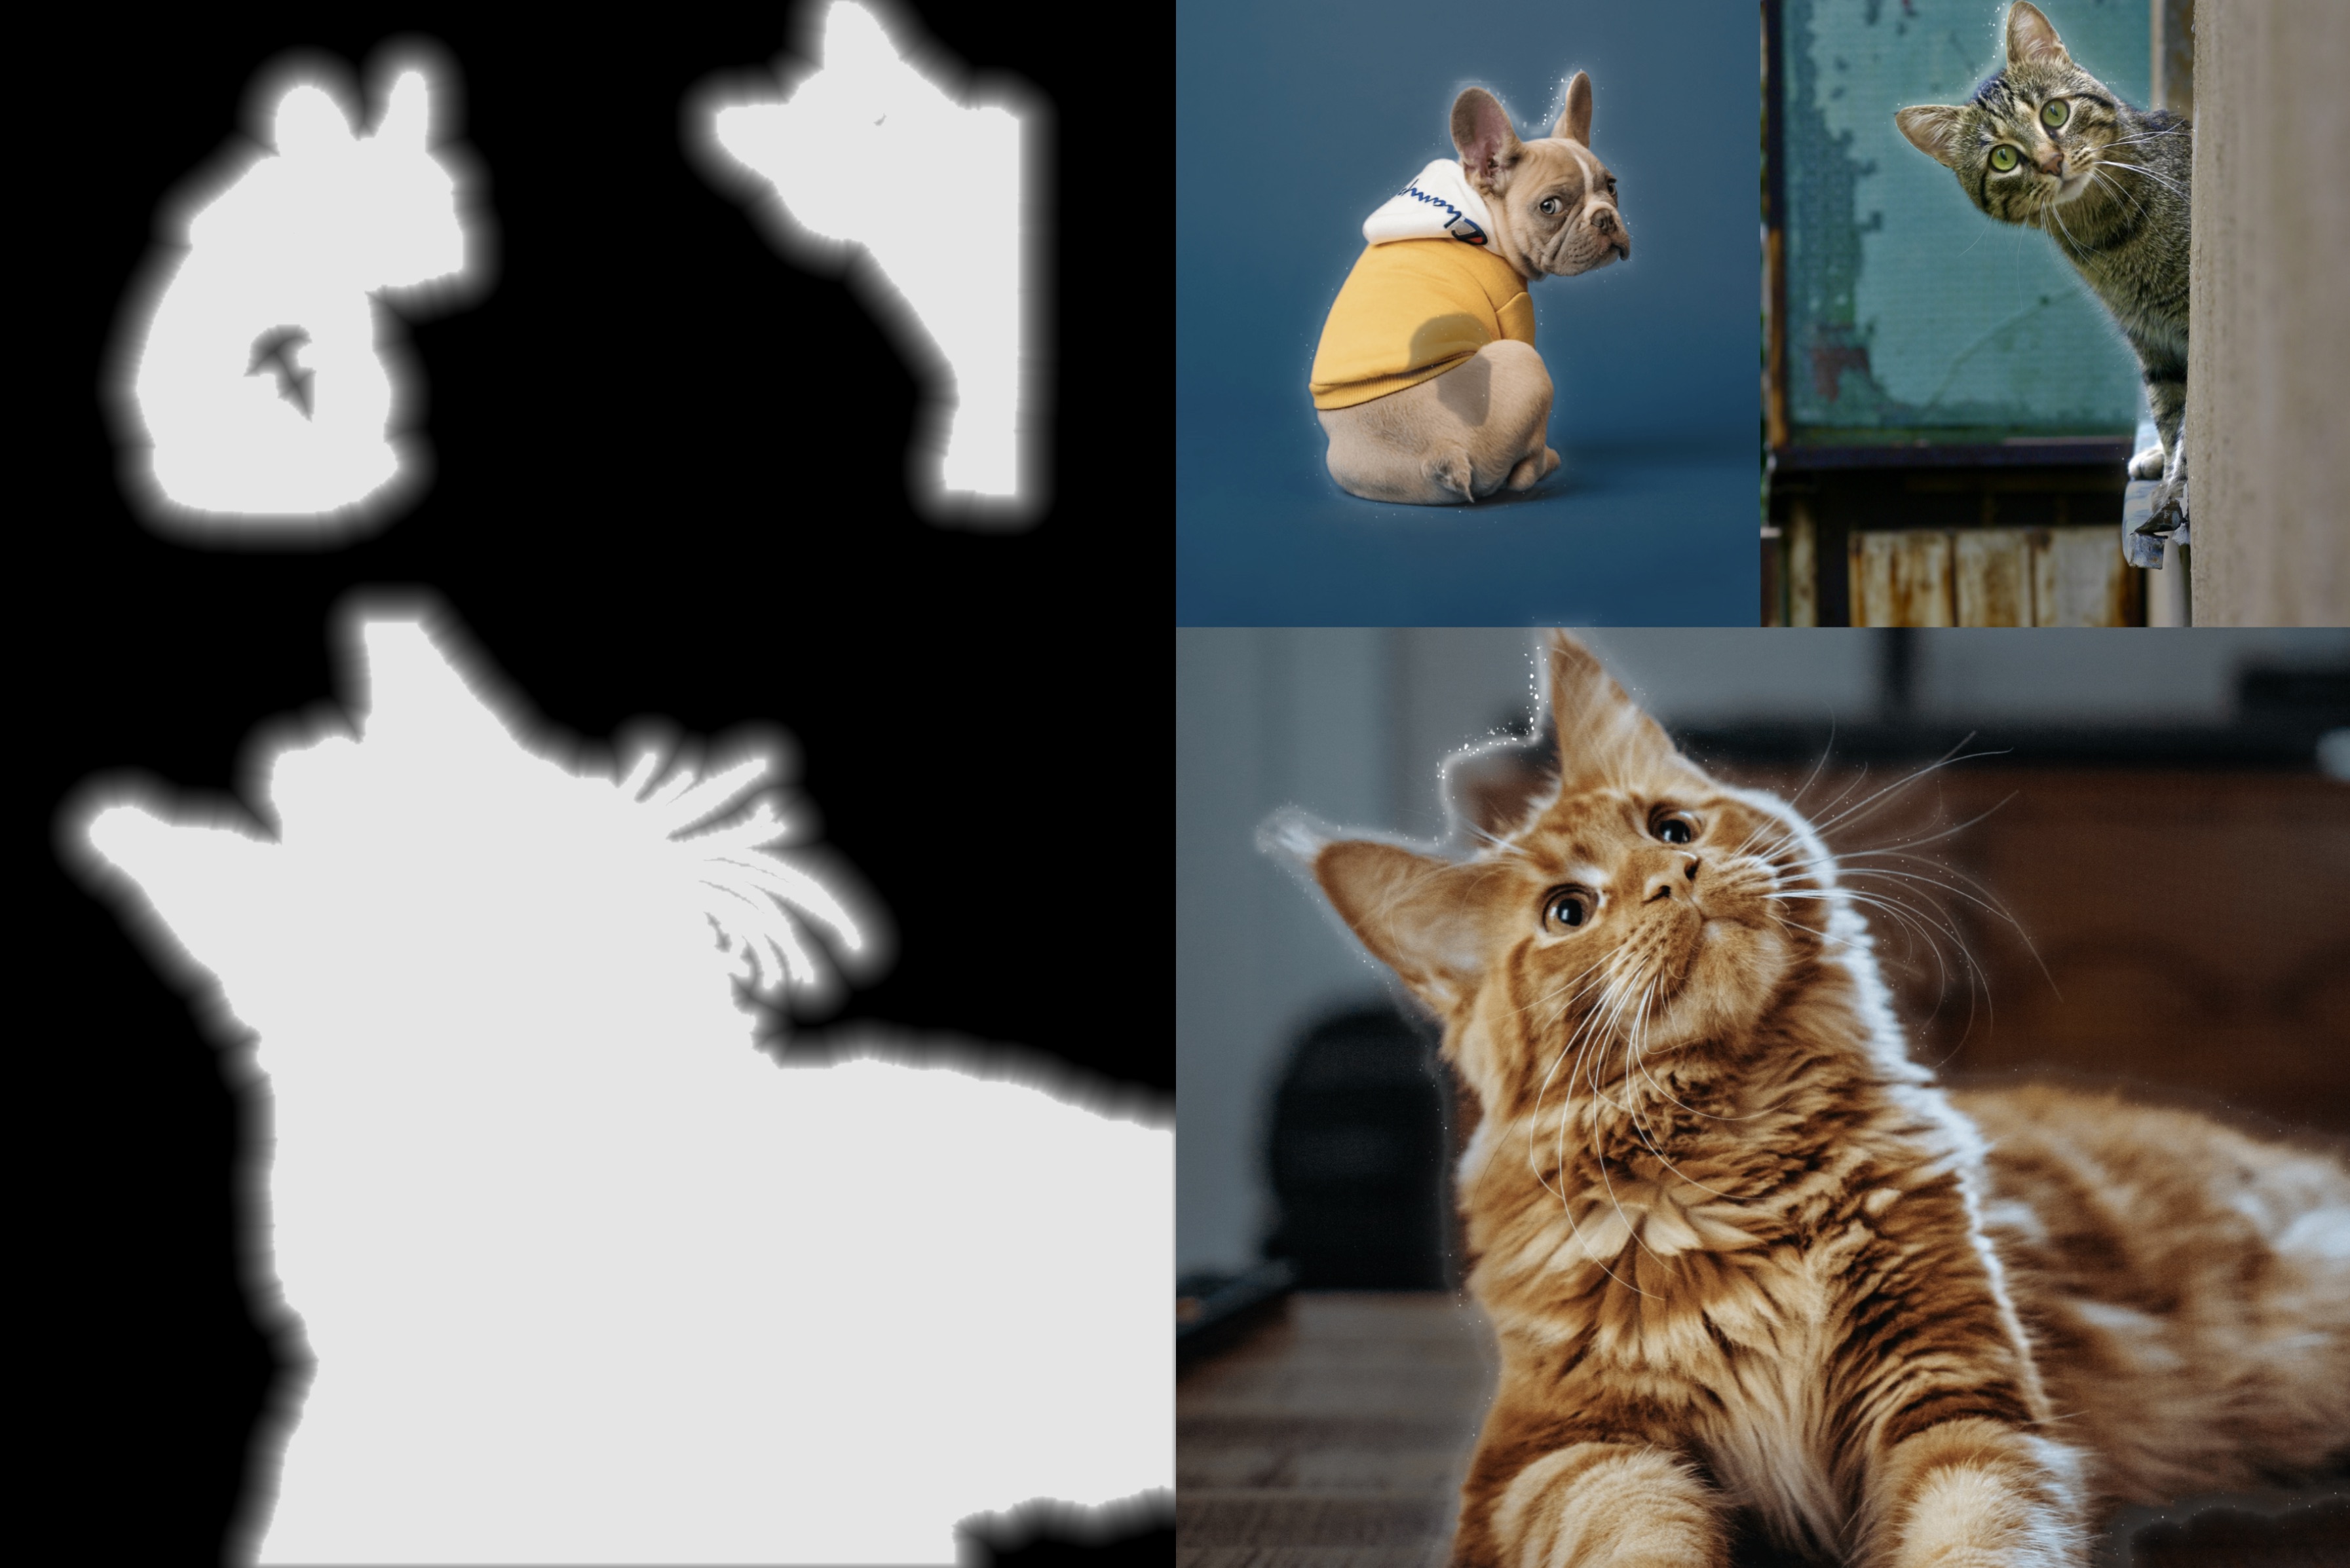
5. Generate UDF from alpha
The stroke effect is basically completed at this point. Next, we need to render a glowing effect around the path to highlight the main subject of the cutout. We will use UDF (Unsigned Distance Field) to generate the glowing effect.
Generating UDFs is computation-intensive. We utilize GPU and PingPong Buffers to achieve efficient UDF generation. The detailed implementation is explained here in this article Min Erosion - GPU-amenable Distance Field.
6. Composition
Here, all the necessary elements for the composition are ready. We will blend the stroke and glow effects into the original image, adjusting these effects according to the lighting progression. Additionally, some particle effects will be added to enhance the dynamic feel of the scene.