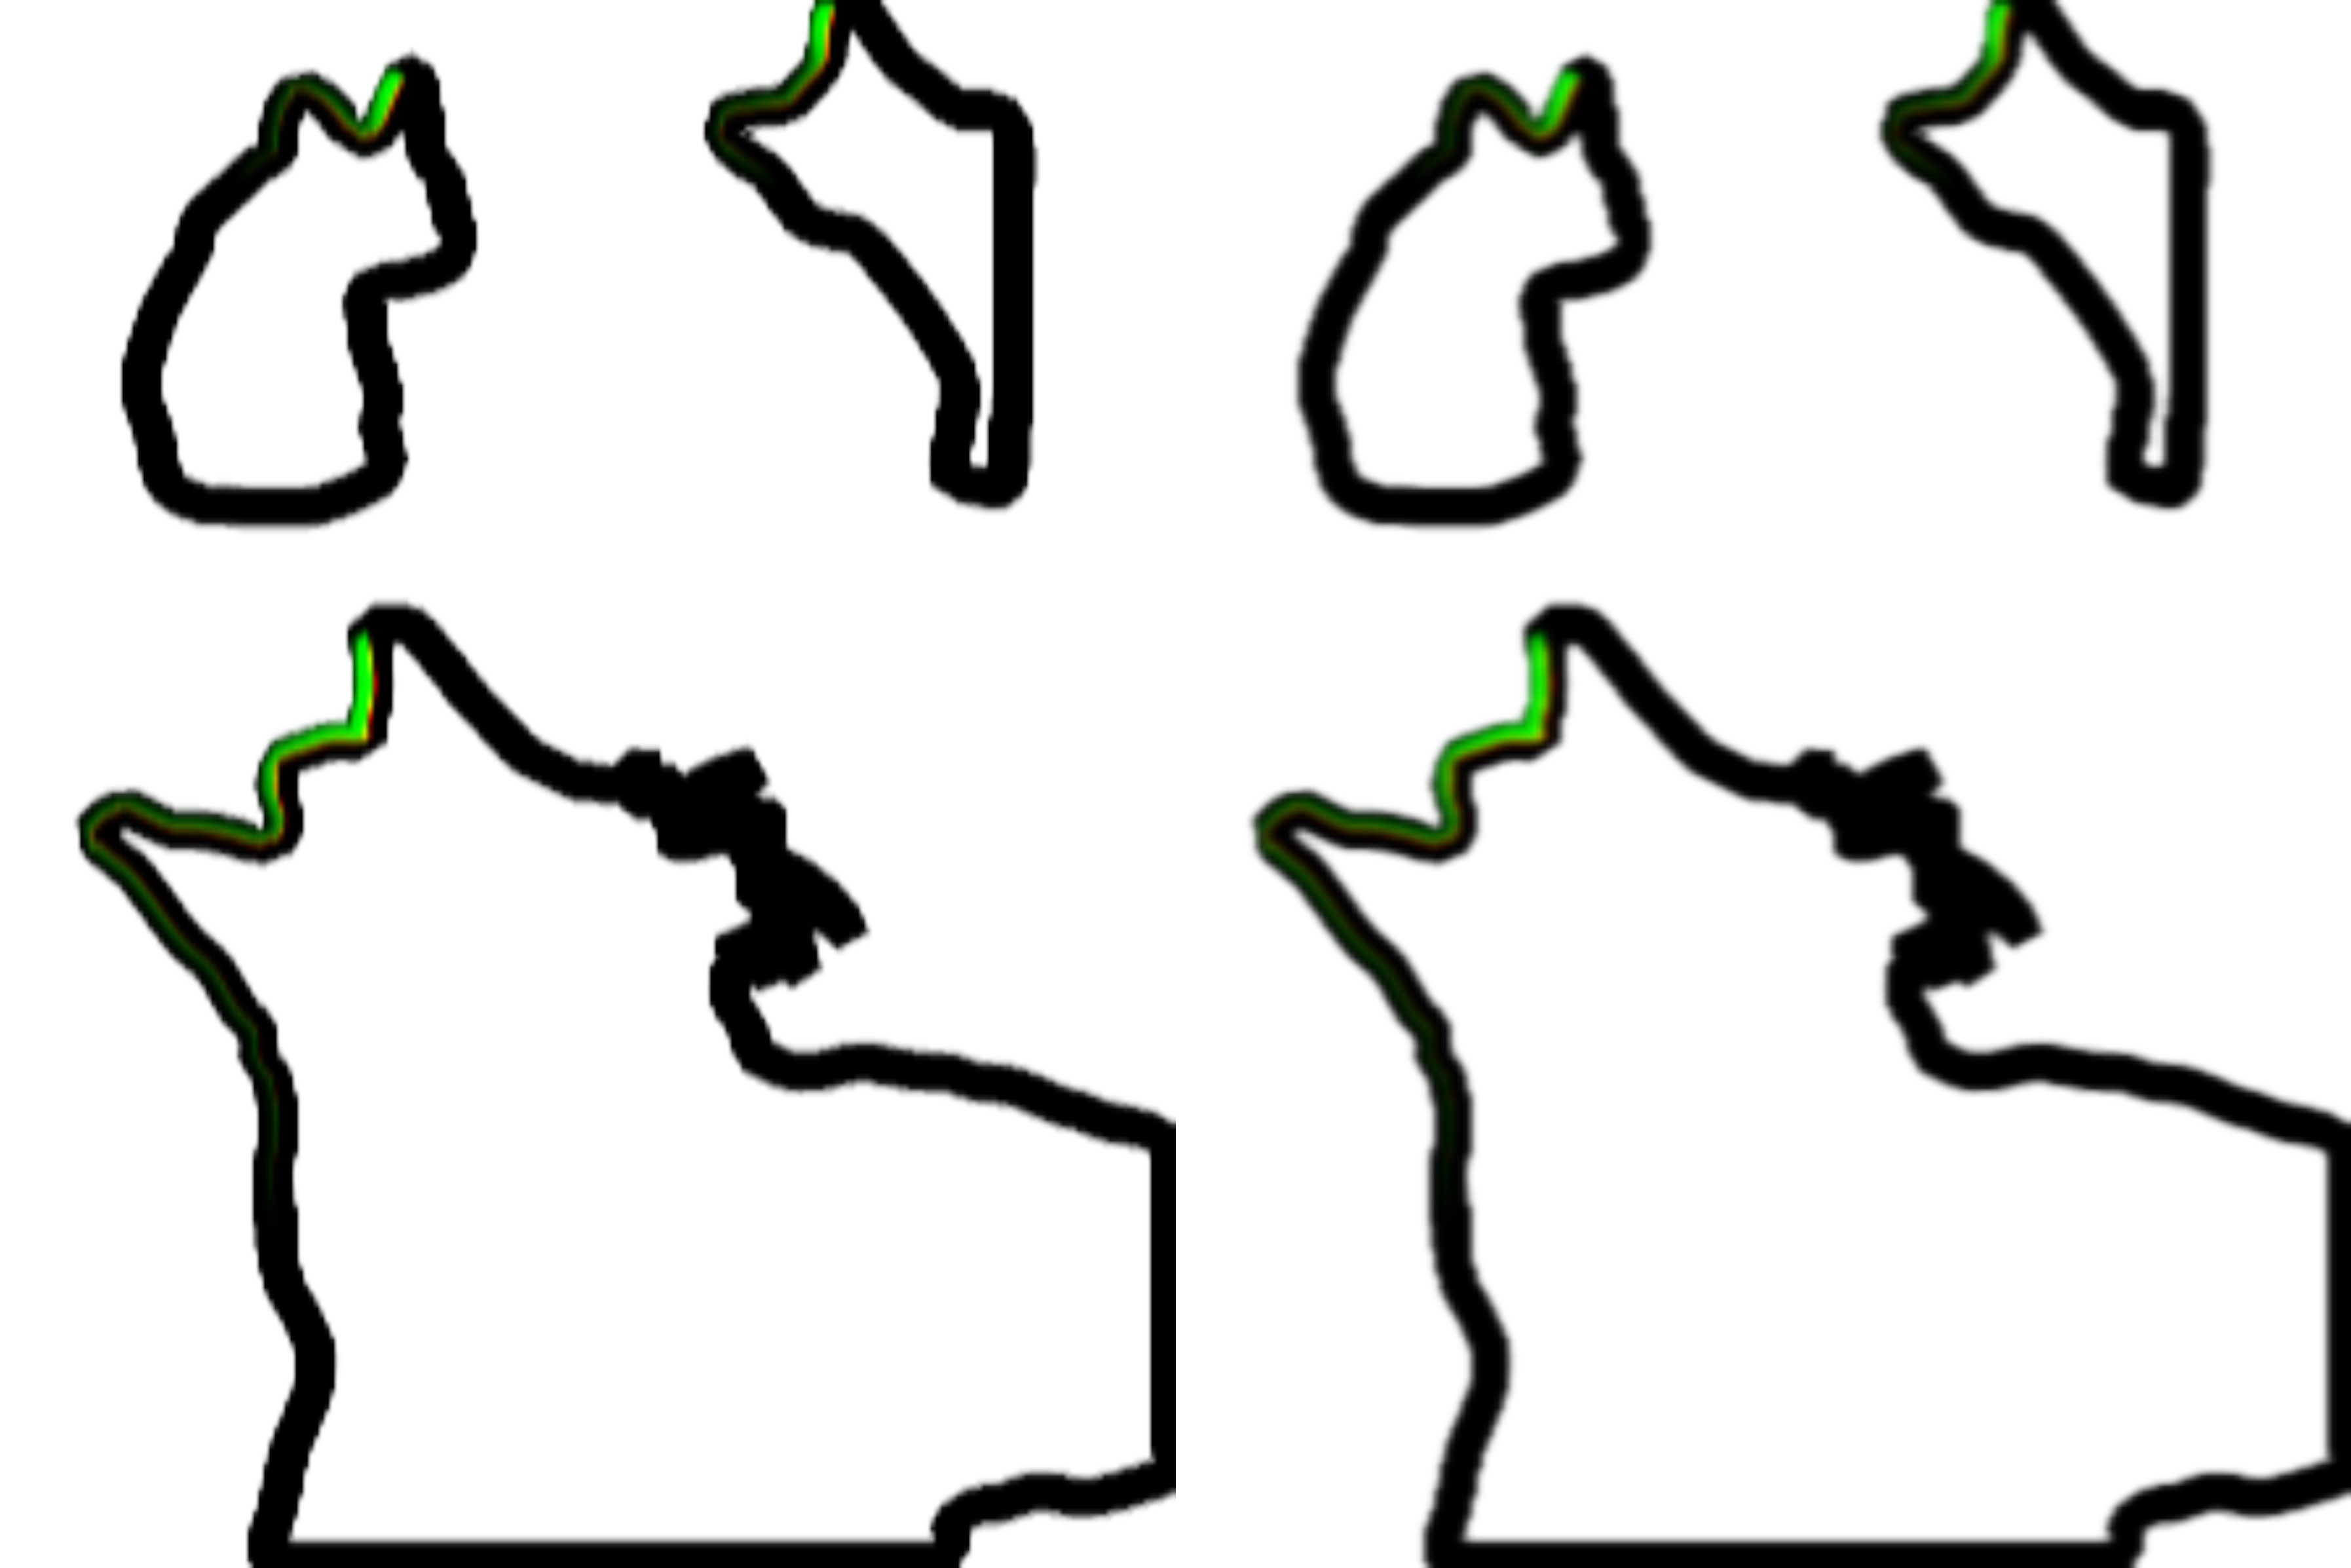
1. 路径三角化
抠图算法返回的是 json 格式的 path, 我们需要将这些 line segments 转换成 mesh line 以便渲染。 Path 转 Mesh Line 的方法已经有很多人分享过, 在这个项目中我们使用的是最基本的方法。如果感兴趣的 话可以看看下面这些文章。
for (let j=0; j< segments.length; j++) {
  const cs = segments[j]

  // direction
  const v = cs.mp2.clone().sub(cs.mp1)

  const t0: Vector2 = t2 ?? cs.e1p1
  let t1: Vector2 = t3 ?? cs.e2p1

  t2 = j === segments.length - 1 ? segments[0].e1p1 : cs.e1p2
  t3 = j === segments.length - 1 ? segments[0].e2p1 : cs.e2p2

  // cross check
  // if (intercept(t1, t0, t3, t2, false)) {
  //   t2 = t0
  //   t3 = t1
  //   continue
  // }

  // offset vertex by some amount along segment's normal.
  vertices.push( t1.x / scale.x - 0.5, 0.5 - t1.y / scale.y, 0.0 )
  vertices.push( t0.x / scale.x - 0.5, 0.5 - t0.y / scale.y, 0.0 )
  vertices.push( t2.x / scale.x - 0.5, 0.5 - t2.y / scale.y, 0.0 )

  vertices.push( t3.x / scale.x - 0.5, 0.5 - t3.y / scale.y, 0.0 )
  vertices.push( t1.x / scale.x - 0.5, 0.5 - t1.y / scale.y, 0.0 )
  vertices.push( t2.x / scale.x - 0.5, 0.5 - t2.y / scale.y, 0.0 )

  ...
}

2. UV重采样
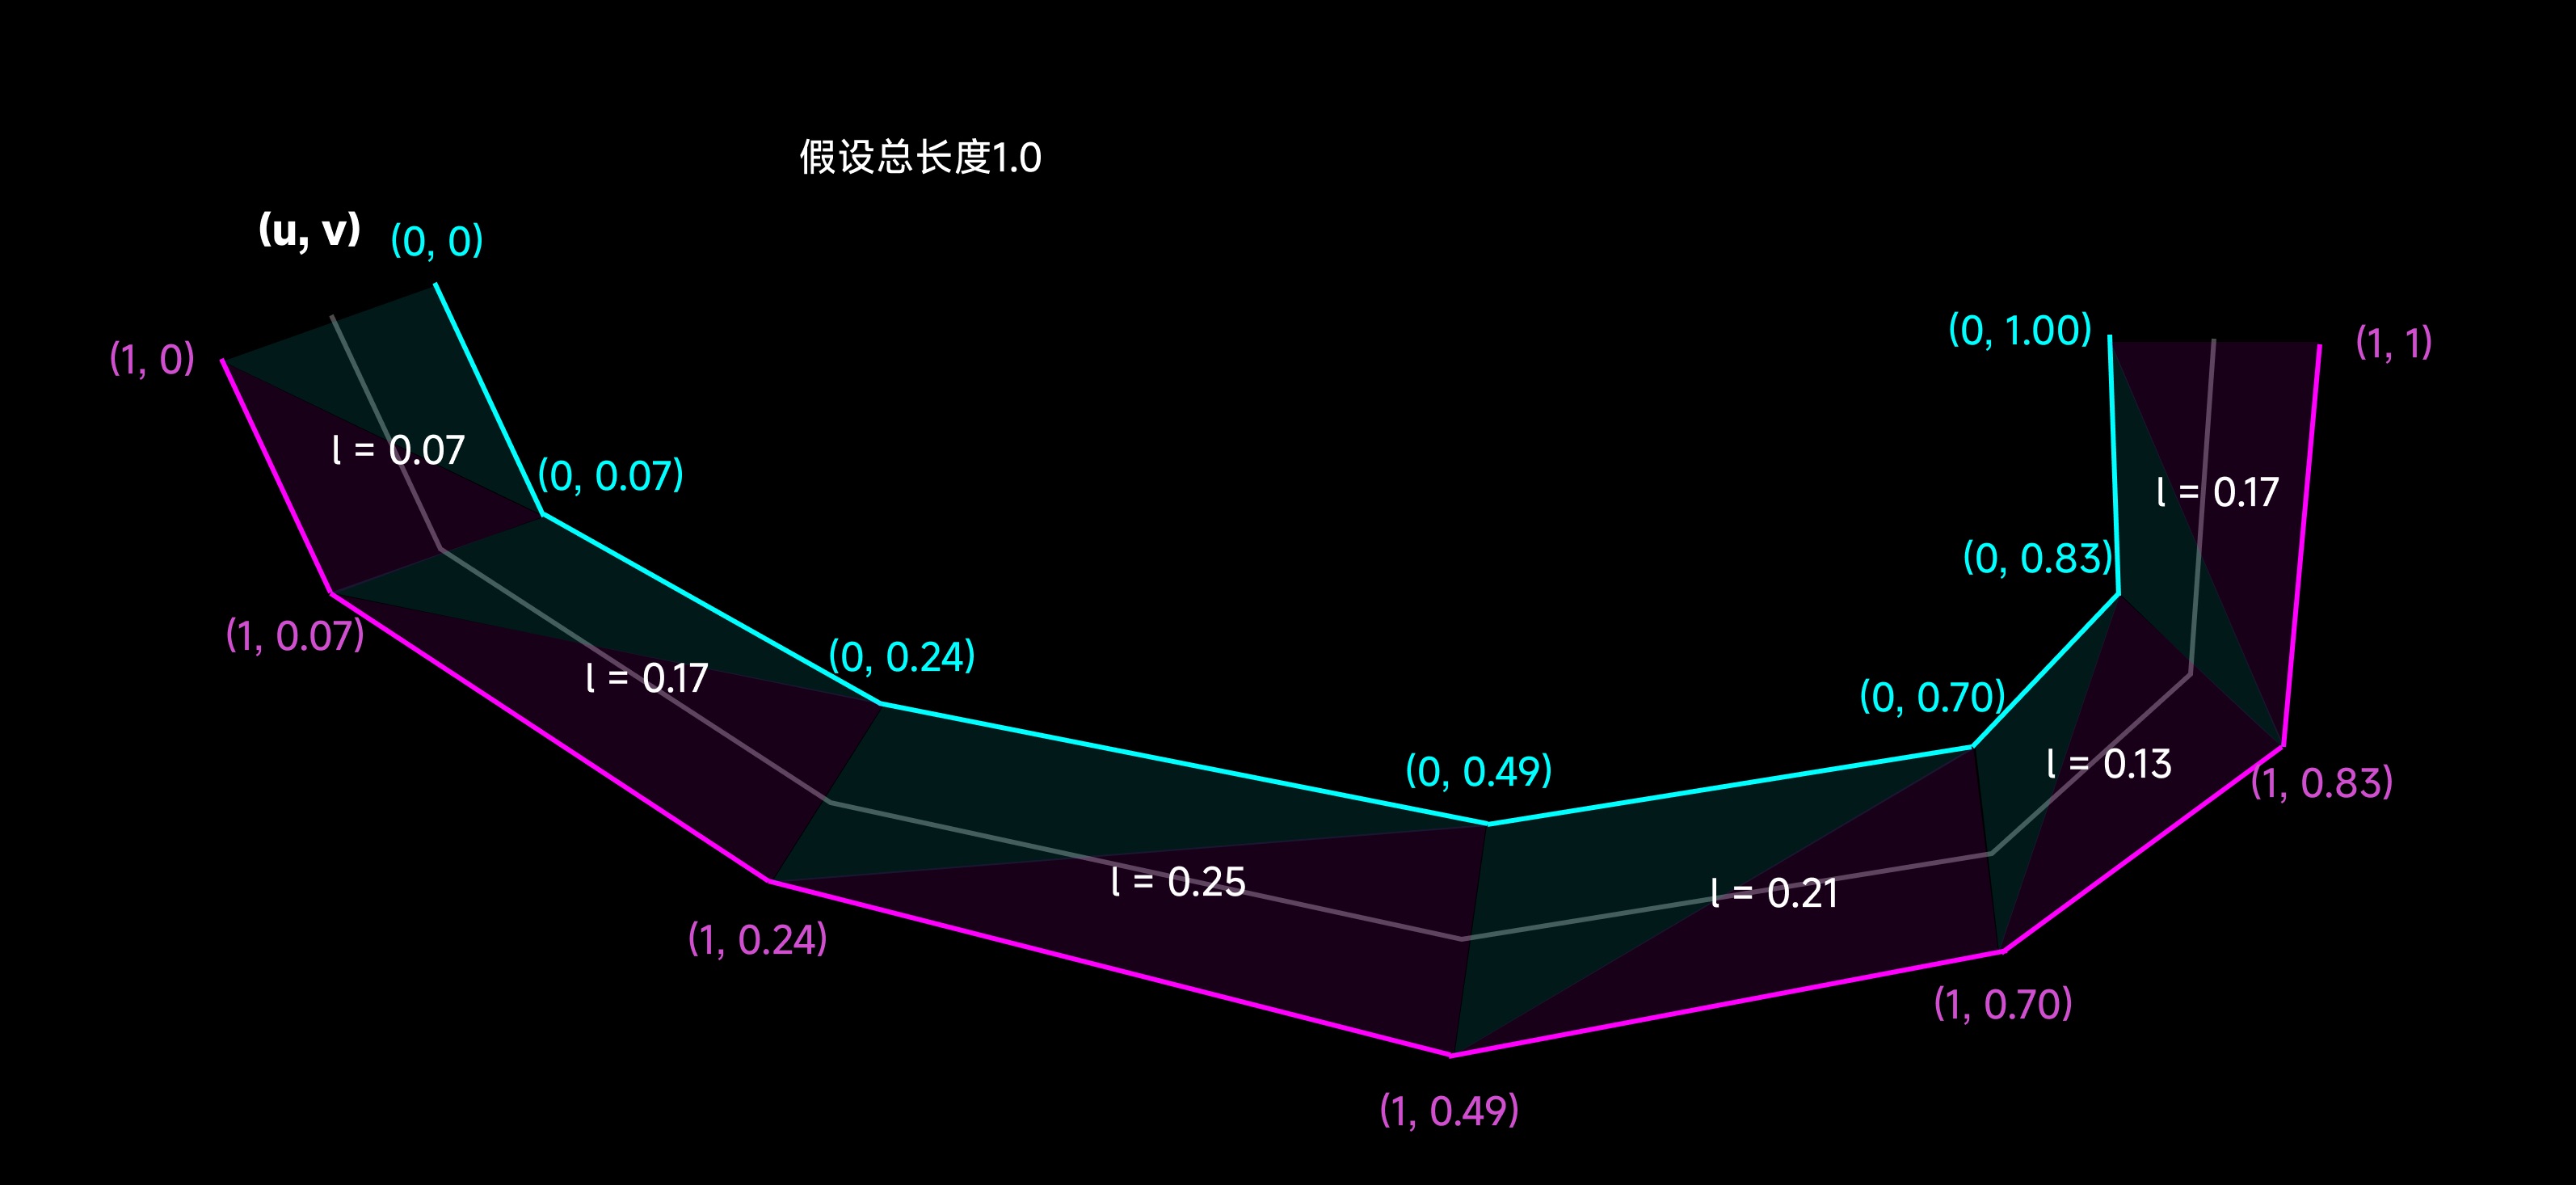
为了实现描边和发光的动画效果, 需要对生成的 mesh line 进行 UV 重采样。 重采样的思路是将每一段 line segment 的长度映射到 V 轴上, 这样就可以实现沿着路径的动画效果。
for (let j=0; j< segments.length; j++) {

  ...

  // remap UV
  mappedVertices.push( 0.0, l )
  mappedVertices.push( 1.0, l )
  mappedVertices.push( 1.0, l + v.clone().length() )

  mappedVertices.push( 0.0, l + v.clone().length() )
  mappedVertices.push( 0.0, l )
  mappedVertices.push( 1.0, l + v.clone().length() )

  l += v.clone().length()
}

3. 动画
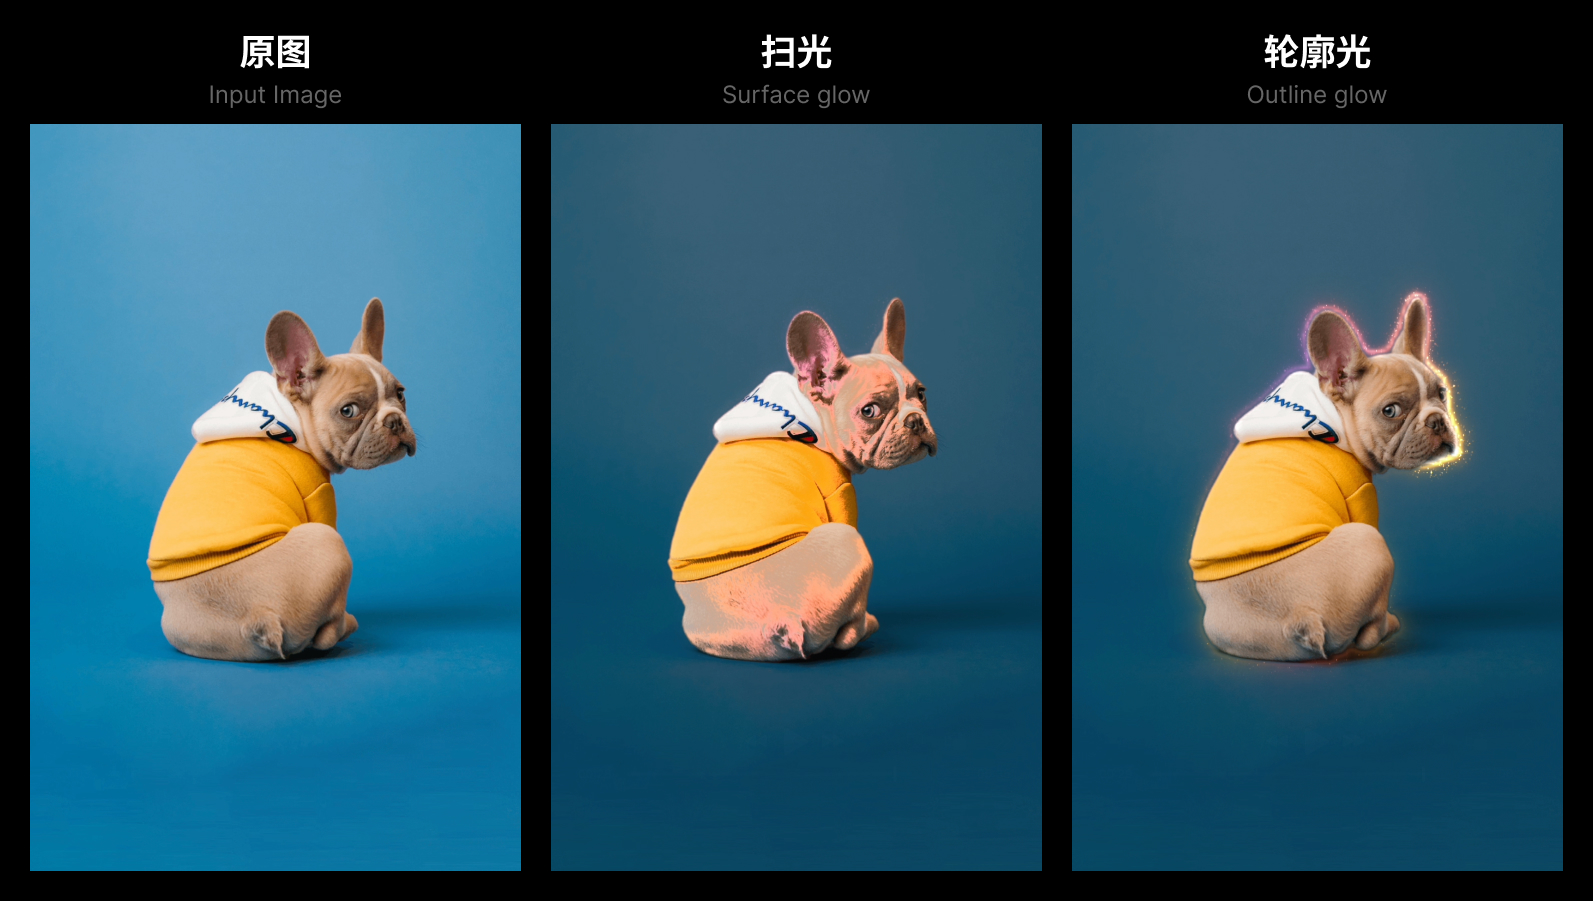
渲染描边和发光效果的时候, 需要在第一个render pass中将描边和发光的材质(region)沿着展开的 UV进行映射, 然后根据光照的进度分别在R和G通道(红色和绿色部分)的对应位置进行渲染。这样在最终 合成的时候就可以利用这两个通道来控制描边和发光的动画进度。
varying vec2 aUv;
varying vec2 vUv;

uniform float uProgress;
uniform float uLineAlpha;
uniform float uRegionAlpha;
uniform float uHighlightWidth;
uniform float uLineLength;

uniform sampler2D uWandTex;
uniform sampler2D uGlowTex;

float map(float x1, float x2, float y1, float y2, float x) {
  return (x - x1) / (x2 - x1) * (y2 - y1) + y1;
}

float shiftMod(float x, float offset, float m) {
  return x + offset > m ? x + offset - m : x + offset;
}

void main() {
  float progress = uProgress;
  float end = progress - uLineLength;
  float start = progress;
  float x = aUv.x;
  float y = 1.0-aUv.y;

  if (end < 0.0) {
    y = shiftMod(y, -end, 1.0);
    start = shiftMod(start, -end, 1.0);
    end = shiftMod(end, -end, 1.0);
  }

  vec2 st = vec2(x, y);
  st.y = map(start, end, 1.0, 0.0, st.y);

  float region = texture(uGlowTex, st).a * uRegionAlpha;
  if (st.y > 0.99 || st.y < 0.01 || st.x > 0.99 || st.x < 0.01) region = 0.0;

  st.x -= 0.5;
  st.x *= uHighlightWidth;
  st.x += 0.5;

  float border = texture(uWandTex, st).a * uLineAlpha;

  // clamp edge with transparent white pixels
  if (st.y > 0.99 || st.y < 0.01 || st.x > 0.99 || st.x < 0.01) border = 0.0;

  gl_FragColor = vec4(border, region, 0.0, 1.0);
}
4. 快速高斯模糊
到现在为止仍然有两个问题需要解决:
- 如何使渲染的结果具有光感?
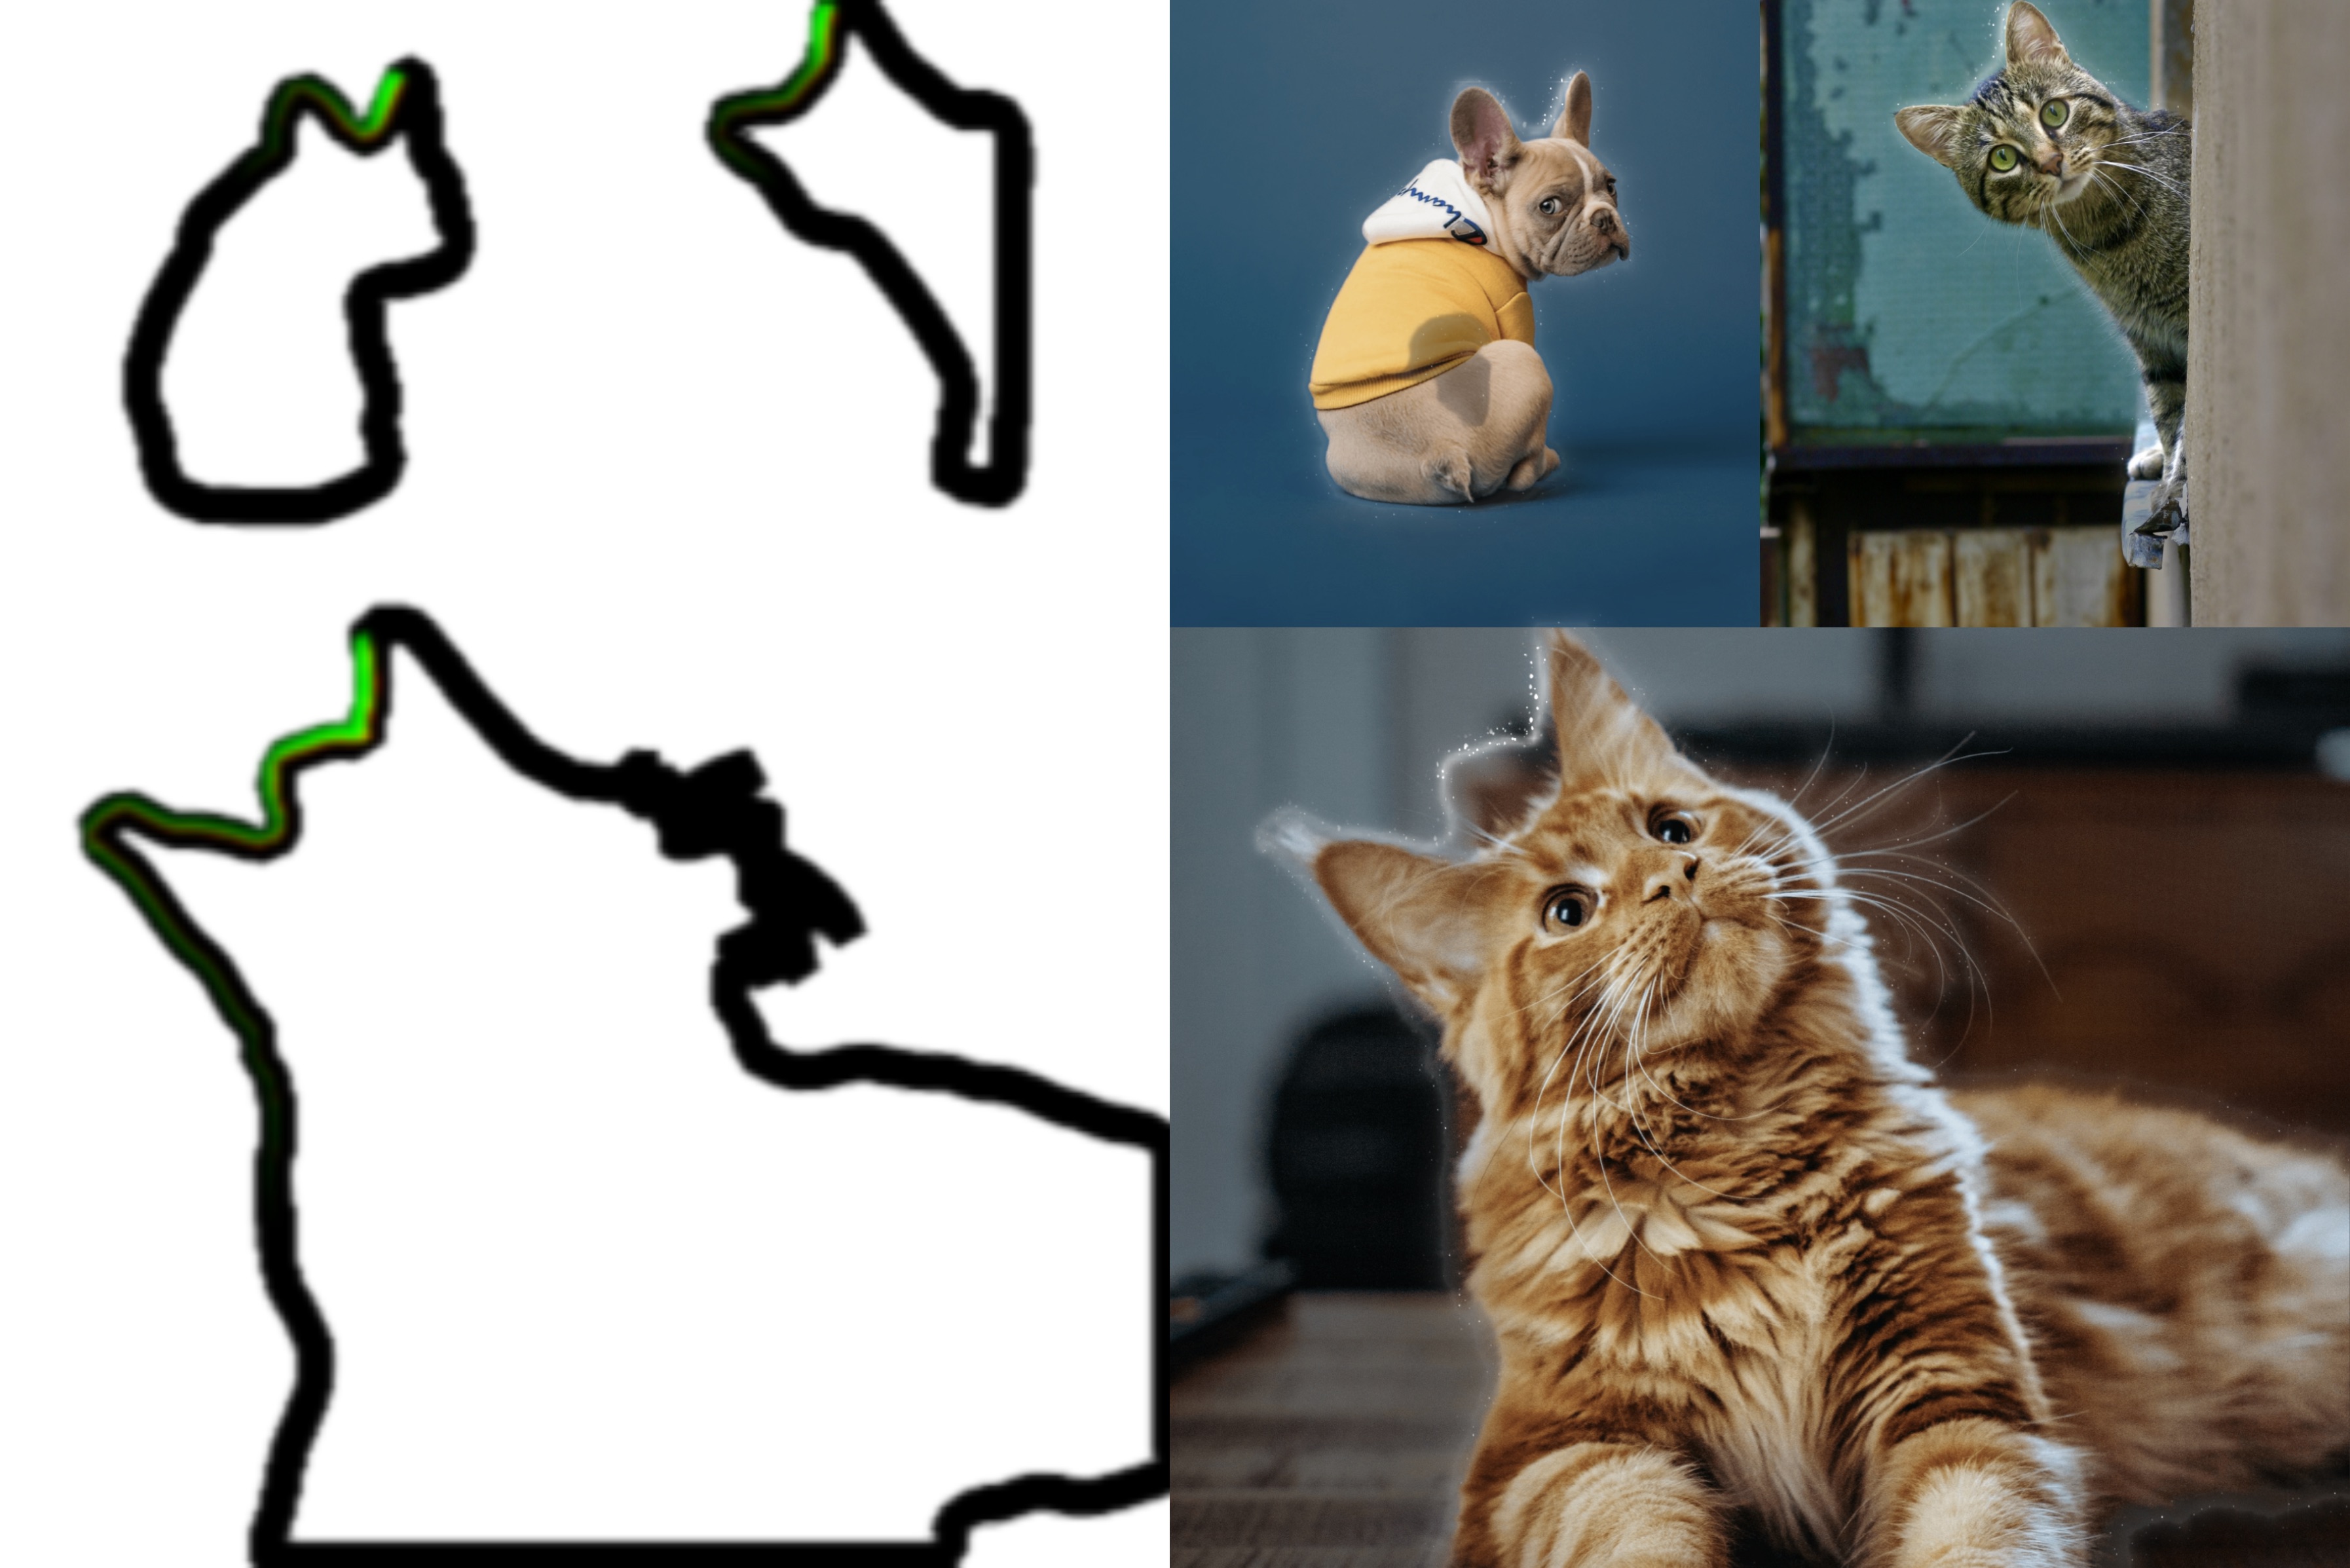
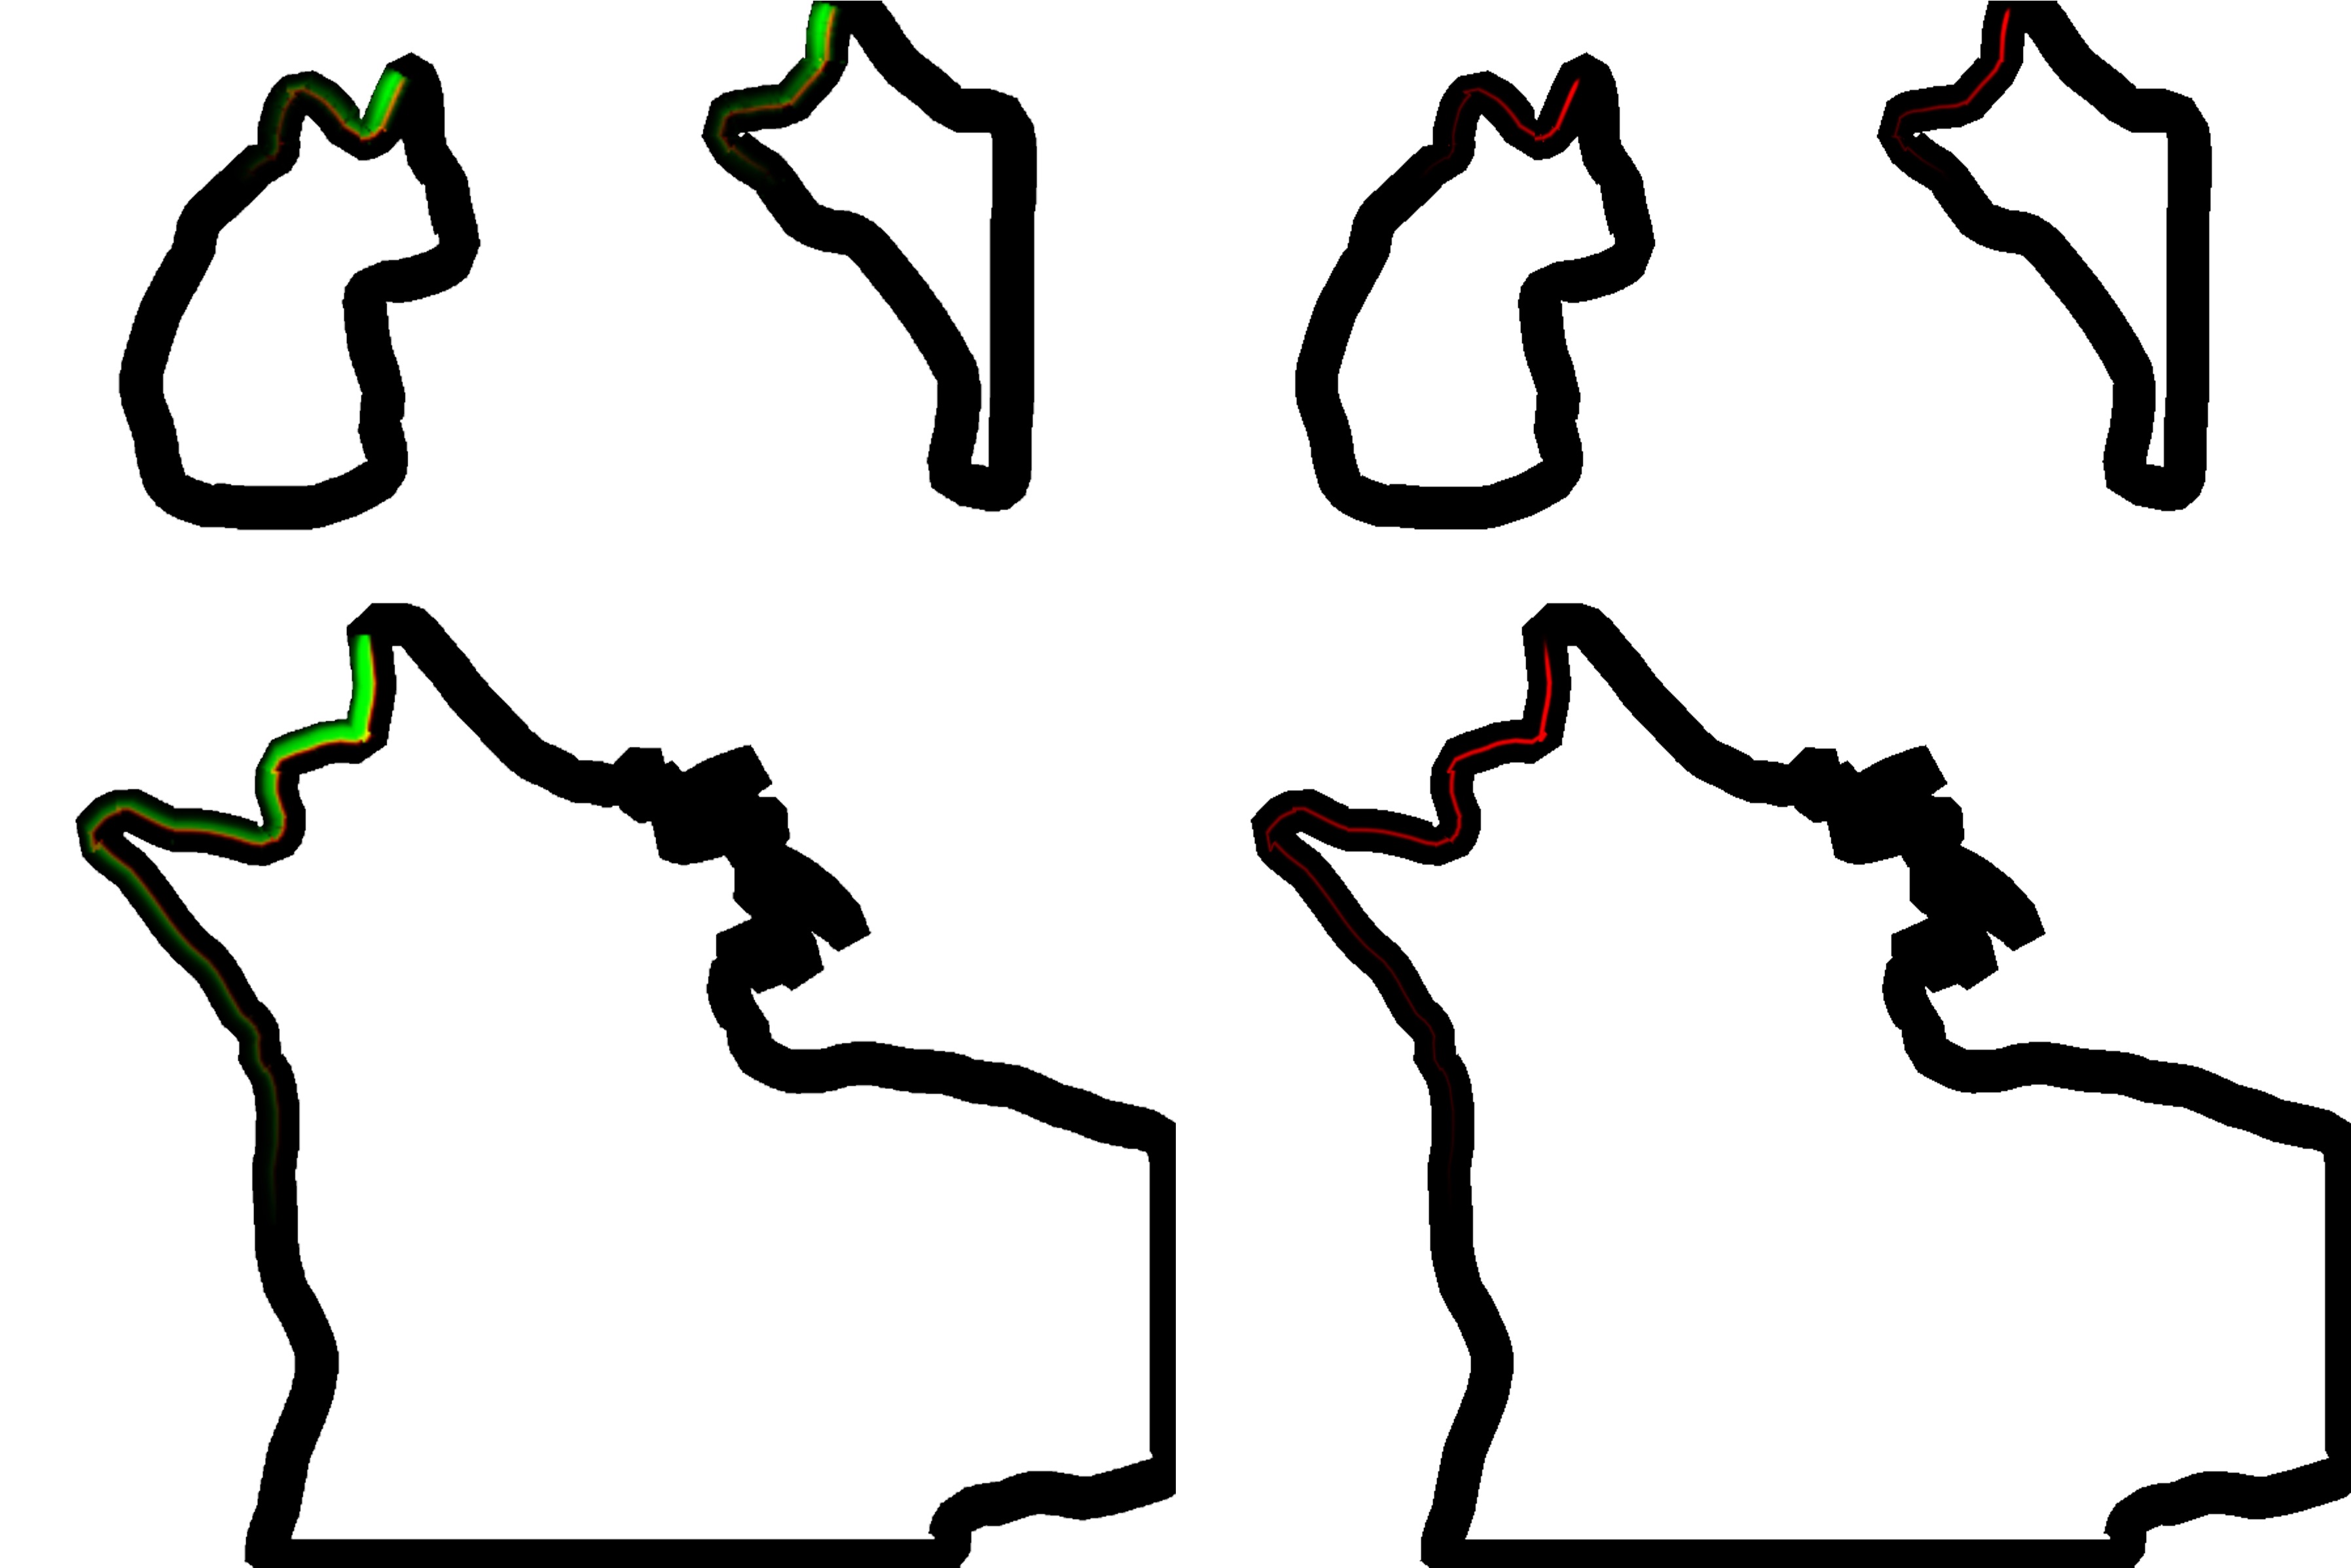
- 如何解决转角处UV重叠的问题?
在这个项目中我们使用双pass高斯模糊来解决这两个问题。双pass高斯模糊将传统的二维卷积核拆分成两个 一维卷积核, 这样可以使用一些特殊的trick, 在减少计算量的同时最大的保留原有图片信息。
// h-blur
const float offset[3] = float[](0.0, 1.3846153846, 3.2307692308);
const float weight[3] = float[](0.2270270270, 0.3162162162, 0.0702702703);
const float LOD = 2.0;
const float RES = 512.0;

uniform sampler2D uTex;
varying vec2 vUv;
uniform float uAspectRatio;

void main() {
  vec4 color = textureLod(uTex, vUv, LOD) * weight[0];
  for (int i=1; i<3; i++) {
    color += textureLod(uTex, vUv + vec2(0.0, offset[i] * uAspectRatio / RES), LOD) * weight[i];
    color += textureLod(uTex, vUv - vec2(0.0, offset[i] * uAspectRatio / RES), LOD) * weight[i];
  }

  gl_FragColor = color;
}
// v-blur
const float offset[3] = float[](0.0, 1.3846153846, 3.2307692308);
const float weight[3] = float[](0.2270270270, 0.3162162162, 0.0702702703);
const float LOD = 2.0;
const float RES = 512.0;

uniform sampler2D uTex;

varying vec2 vUv;

void main() {
  vec4 color = textureLod(uTex, vUv, LOD) * weight[0];
  for (int i=1; i<3; i++) {
    color += textureLod(uTex, vUv + vec2(offset[i] / RES, 0.0), LOD) * weight[i];
    color += textureLod(uTex, vUv - vec2(offset[i] / RES, 0.0), LOD) * weight[i];
  }

  gl_FragColor = color;
}
5. 实时UDF
描边的效果到这里就基本完成了。接下来需要在path周围渲染一圈发光的效果来突出抠图的主体。我们将使用 UDF (Unsigned Distance Field) 来生成发光的效果。
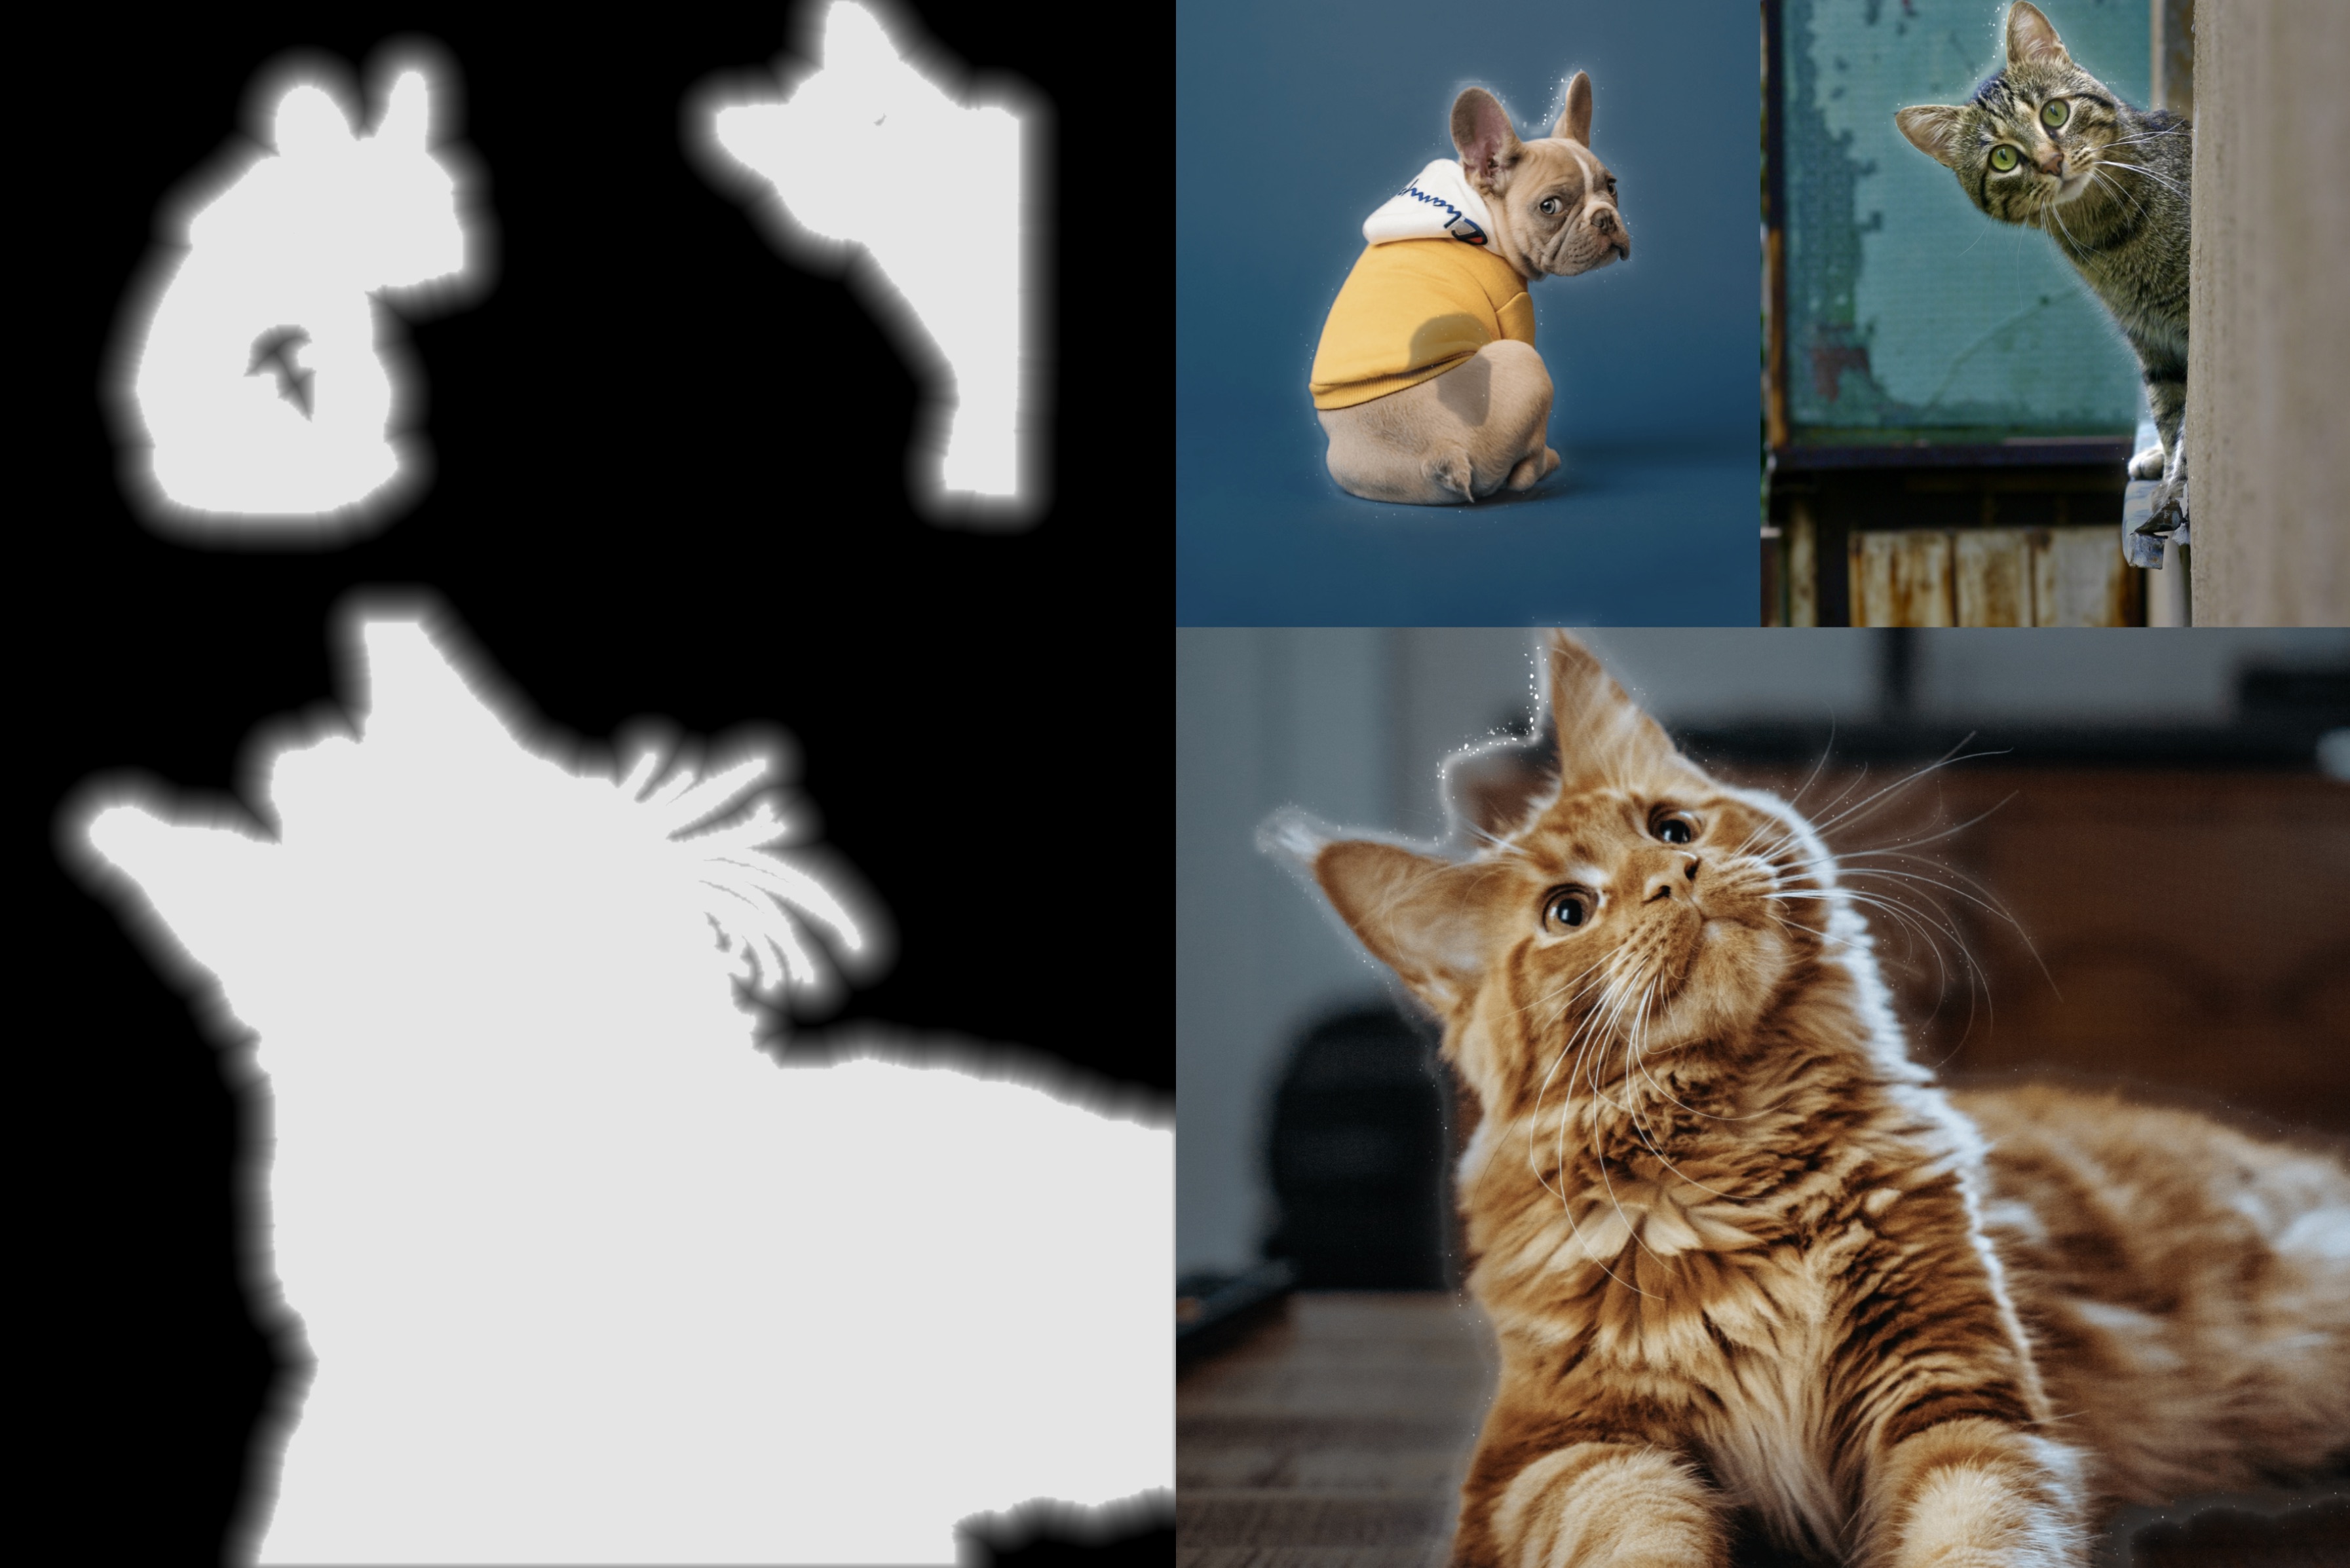
UDF 的生成比较耗费资源, 我们利用 GPU 和 PingPong Buffer 来实现高效的 UDF 生成。具体的实现思路 在这篇文章中有详细介绍, 有兴趣的话可以参考一下 Min Erosion - GPU-amenable Distance Field
6. 合成
到这里合成所需的所有要素都已准备齐全。我们将描边和发光的效果合成到原图上, 并且根据光照的进度 来调整描边和发光的效果, 同时加上一些粒子效果来增加画面的动感。